If you are looking for a power meter , please read this article first. It will help you to confirm whether IAMMETER's product meets your requirements quickly. How to choose the power meter with regard to your requirements
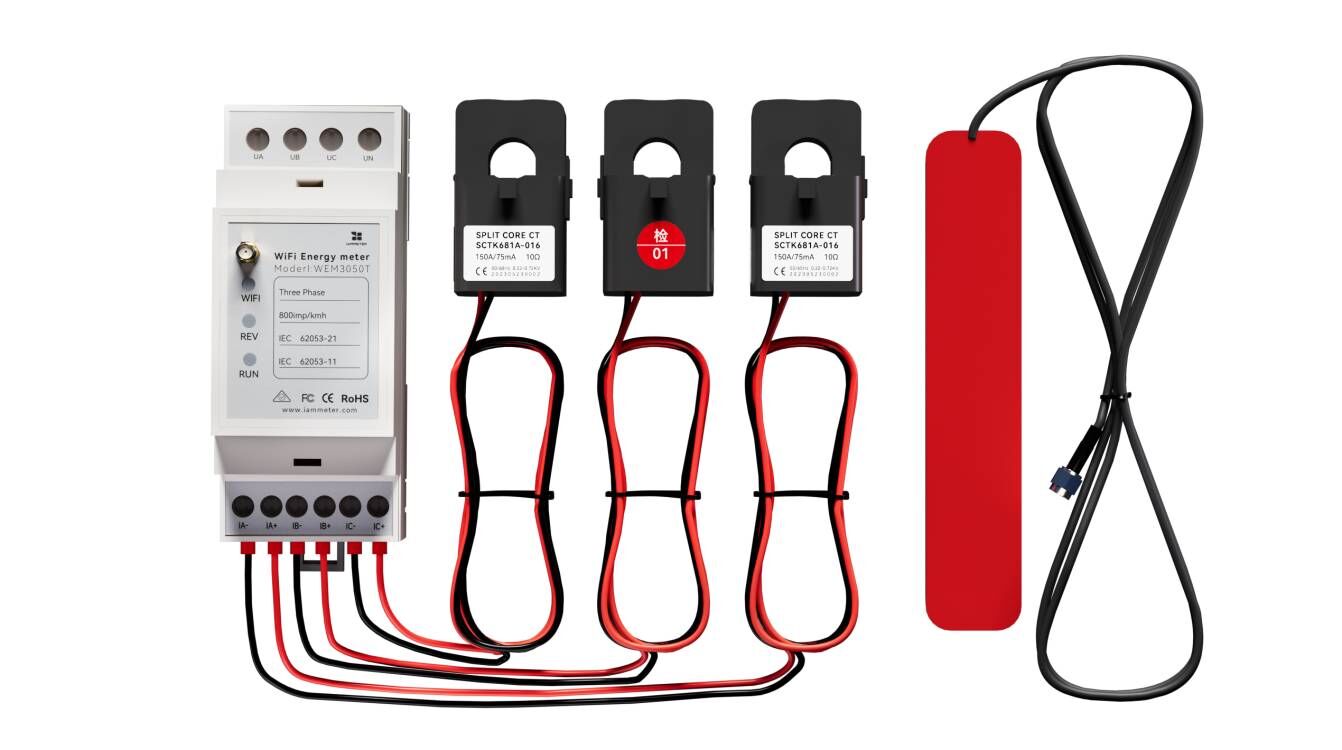
| No. | Item | Qty | Remark |
|---|---|---|---|
| 1 | Wi-Fi Energy Meter | 1 | Wi-Fi Module Embedded |
| 2 | Split-core Current Transformer | 3 | 150A |
| 3 | 2.4G Wi-Fi Antenna | 1 |
Please note:
Wiring in a Single Phase Solar PV System In cases where both the solar PV and the grid are single-phase, a single three-phase meter is sufficient. You can install one phase on the grid side and another on the inverter side. The third phase is available for monitoring any special loads you may have. If there's no specific load to monitor, this third phase does not need to be connected.
Note: More wiring diagram in solar PV system ,please refer to Energy meter Wiring diagram in solar pv system

If you set up the phases as shown in the above picture, you should define the "meter-type" accordingly(Please refer to chapter 6).
| Phase | Meter Type | |
|---|---|---|
| 1 | A | Grid |
| 2 | B | Load |
| 3 | C | Solar |
Wiring in a Single Phase Residential Electricity System
When using the three-phase meter in a single-phase system, it can operate as three individual single-phase meters. One phase can be designated as the main meter, with the remaining two serving as sub-meters. Please refer to the wiring diagram below for guidance on this setup.

If you set up the phases as shown in the above picture, you should define the "meter-type" accordingly(Please refer to chapter 6).
| Phase | Meter Type | |
|---|---|---|
| 1 | A | Grid |
| 2 | B | Load |
| 3 | C | Load |
Wiring in a Three Phase Residential Electricity System
The primary application of the three-phase meter is for installation in a three-phase system. The appropriate wiring diagram for this setup is provided below.
Please be aware that the WEM3050T is designed exclusively for use in 3-phase 4-wire systems (WYE/Star connection). It is not compatible with 3-phase 3-wire systems (Delta connection). If you have a 3-phase 3-wire system, you should opt for the WEM3080TD model instead.

If you set up the phases as shown in the above picture, you should define the "meter-type" accordingly(Please refer to chapter 6).
| Phase | Meter Type | |
|---|---|---|
| 1 | A | Grid |
| 2 | B | Grid |
| 3 | C | Grid |
A split-phase or single-phase three-wire system is a prevalent type of single-phase electric power distribution in North America, commonly used in residential and light commercial applications. It involves supplying two 120 V AC lines to premises that are 180 degrees out of phase with each other concerning the neutral, along with a common neutral.
The WEM3050T is suitable for monitoring split phase solar PV systems. See the wiring diagram below for this setup.

If you set up the phases as shown in the above picture, you should define the "meter-type" accordingly(Please refer to chapter 6).
| Phase | Meter Type | |
|---|---|---|
| 1 | A | Grid |
| 2 | B | Grid |
| 3 | C | inverter |
Due to the balanced nature of the two-phase output, a single phase suffices for measuring the inverter output. This is achieved by internally configuring the meter to double the reading obtained from that single phase. Using a 3-Phase Energy Meter for Solar PV and Grid Consumption in a Split-Phase System
If you have both a 3-phase inverter and a 3-phase grid and wish to monitor both (although you have the option to monitor just one), you will require two 3-phase meters, and the wiring diagram is as below.

please refer to Energy meter Wiring diagram in solar pv system
There are two ways to configure meter's WiFi settings. Setting up by mobile App is recommended by us. However, you can also set up it in the browser if you meet any problems when using App.
Video: WiFi set up by mobile App
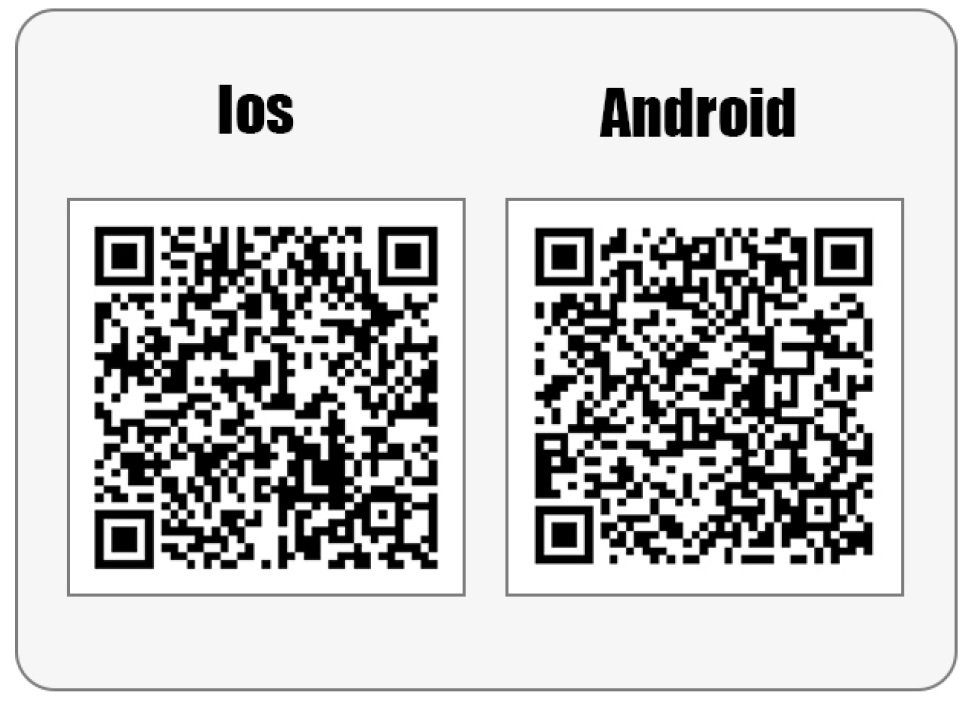
Step1, scan the QR code and download the mobile App
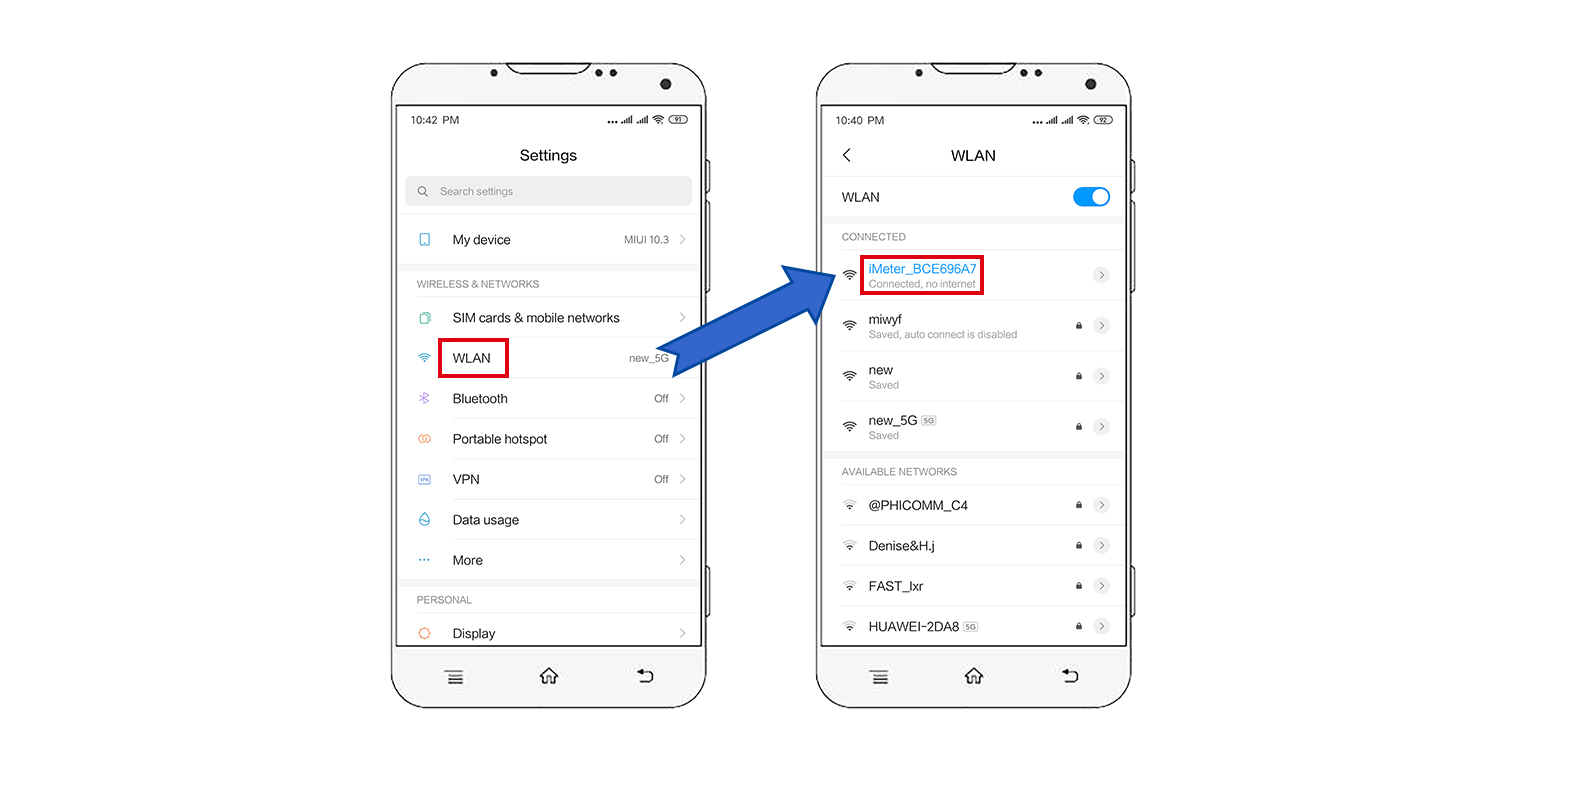
Step 2, search and connect the iMeter's access point signal iMeter_xxxxxxxx by your phone
Step 3, Open app and find the iMeter
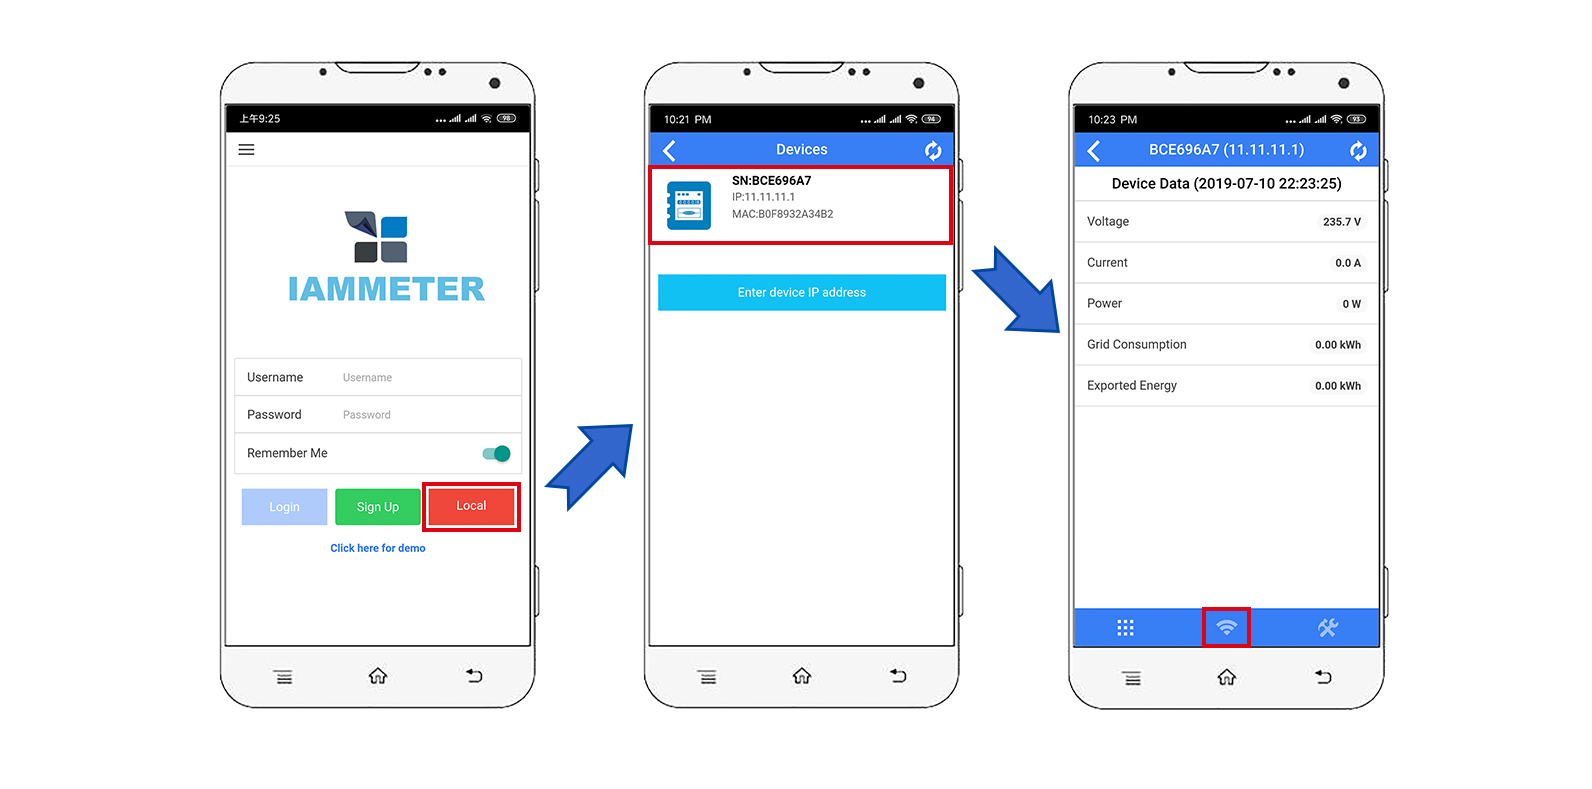
Tips: If the app prompts "Invalid device version", you need to setup the WiFi network by browser, same as 3.1 WEM3162 QuickStart
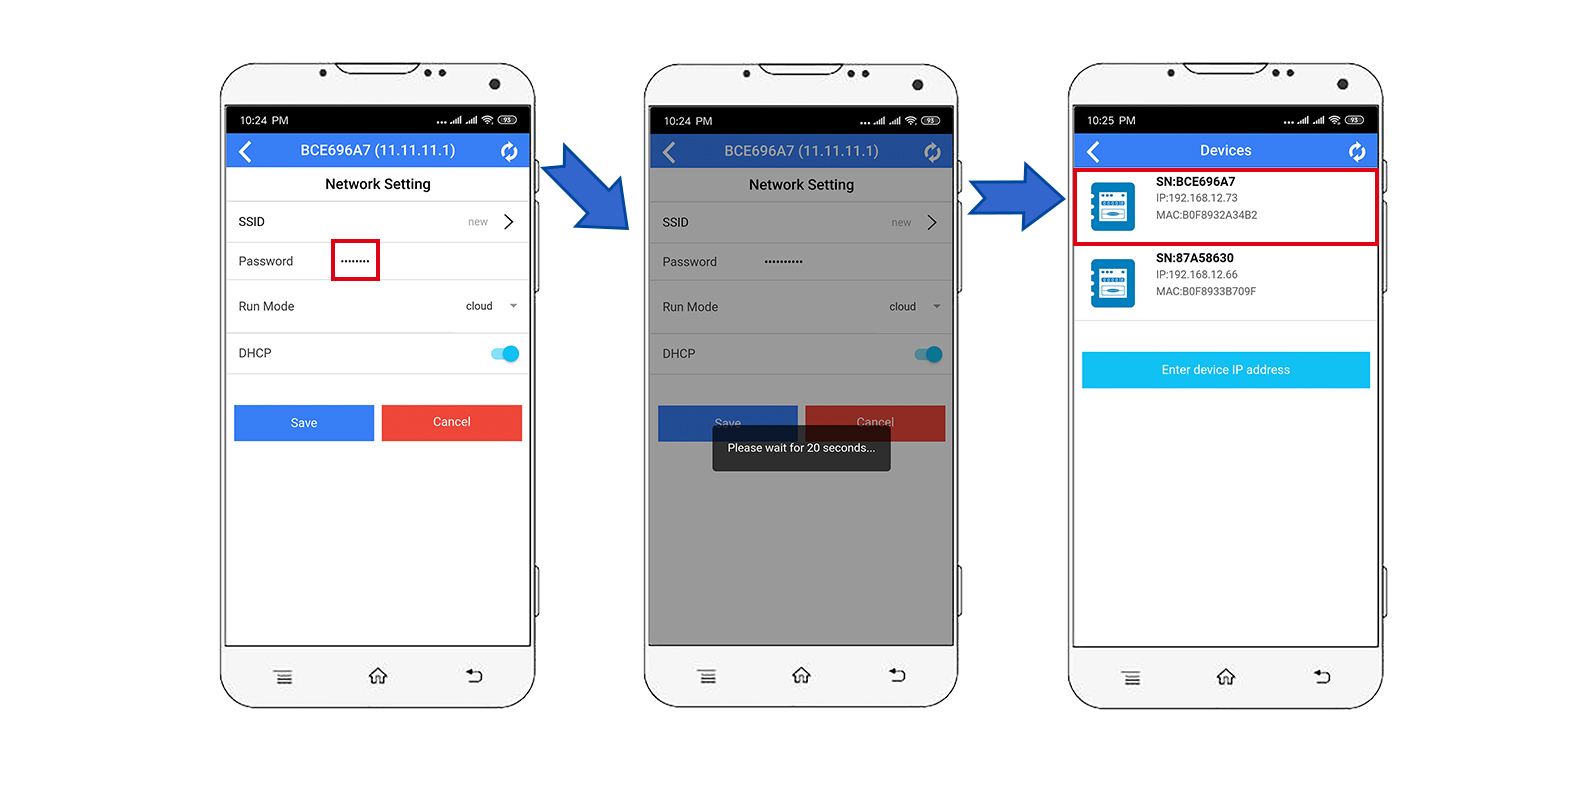
Step 4, Select the SSID of your home WiFi network;
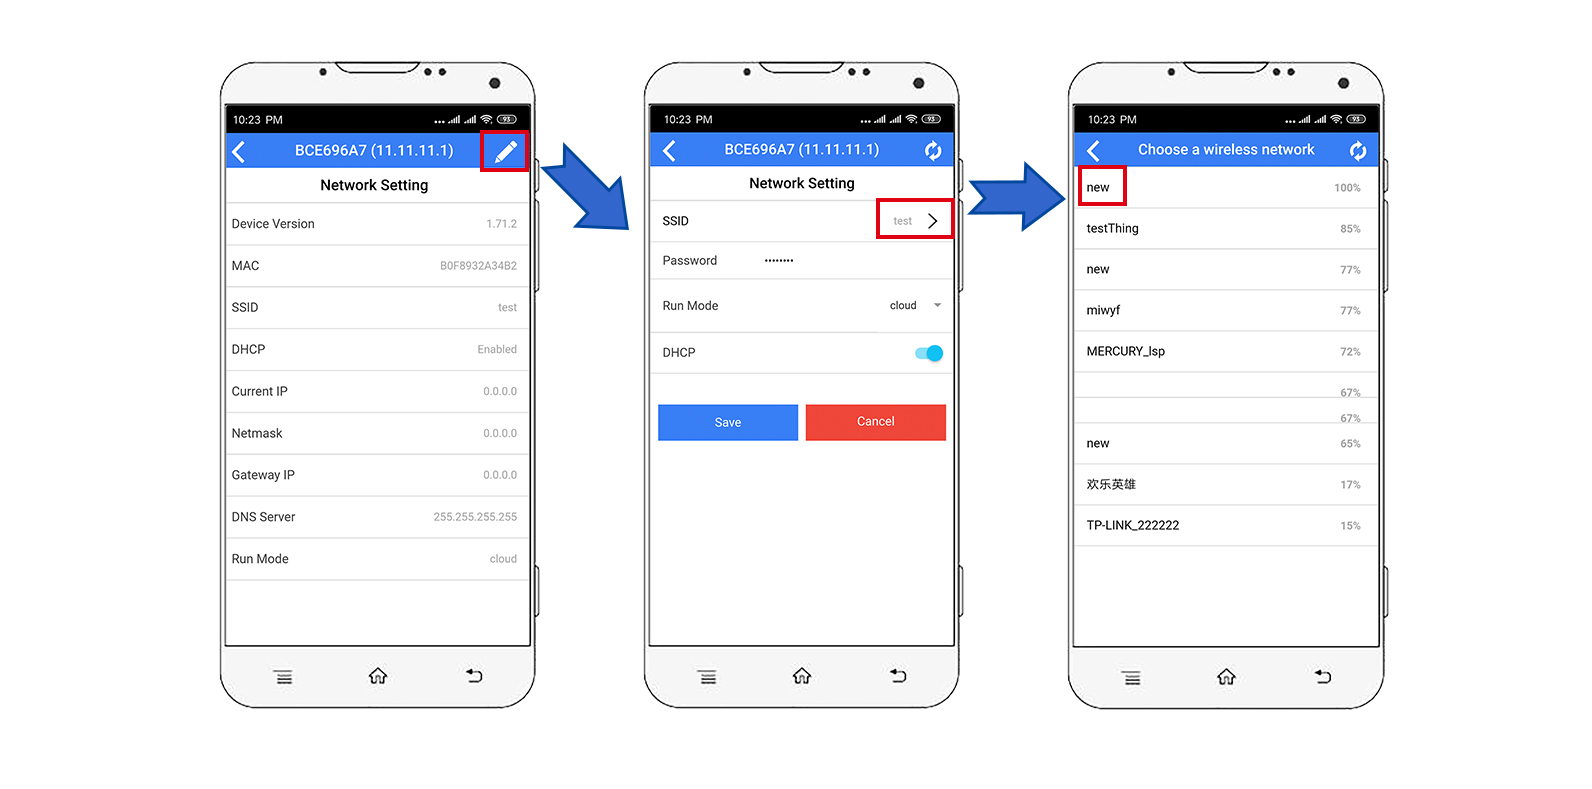
Step 5, Enter password and save. After succesfully configure the WiFi settings, you will see that the IP address allocated for the iMeter.
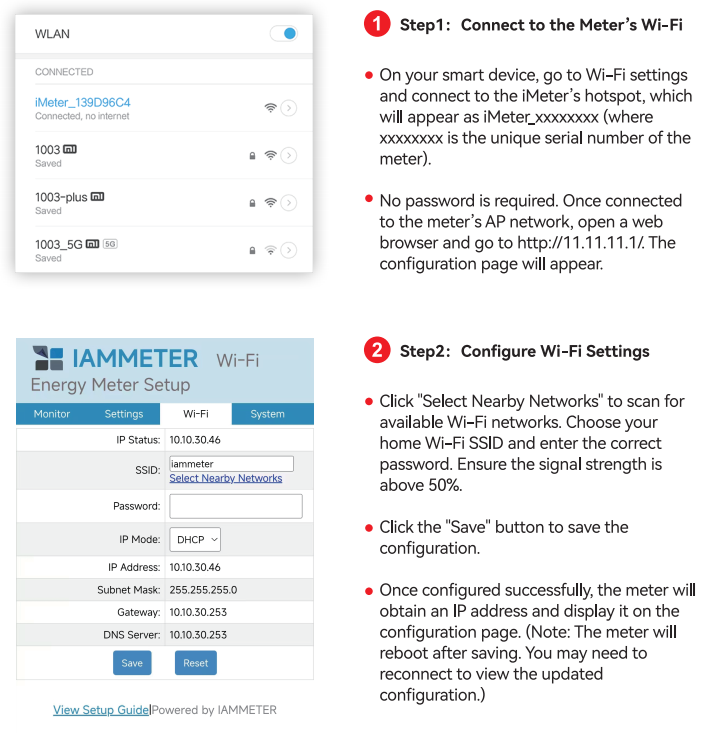
Video: WiFi set up in the browser
If you have successfully set up the meter's WiFi settings by step 3.1, then you can skip this step 3.2.
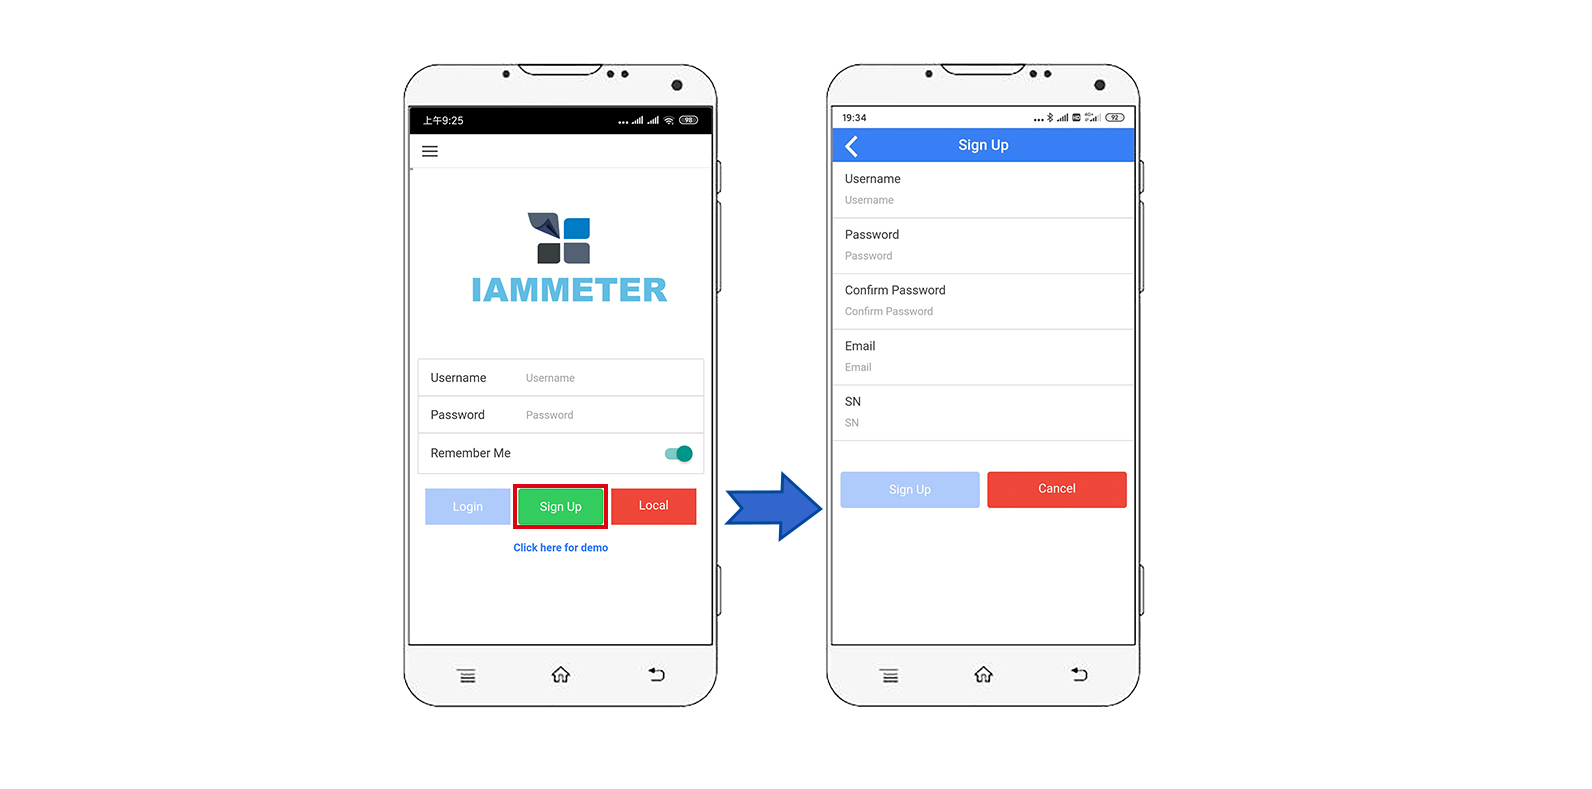
WEM3050T includes free IAMMETER-Cloud Basic service for the entire product lifecycle and provides a one-month trial of the IAMMETER-Cloud Pro version. Users can register an account via the app or a web browser, with the web browser method recommended. For detailed instructions, please refer to: https://www.iammeter.com/blog/wem3050t-pro-free-trial-guide.
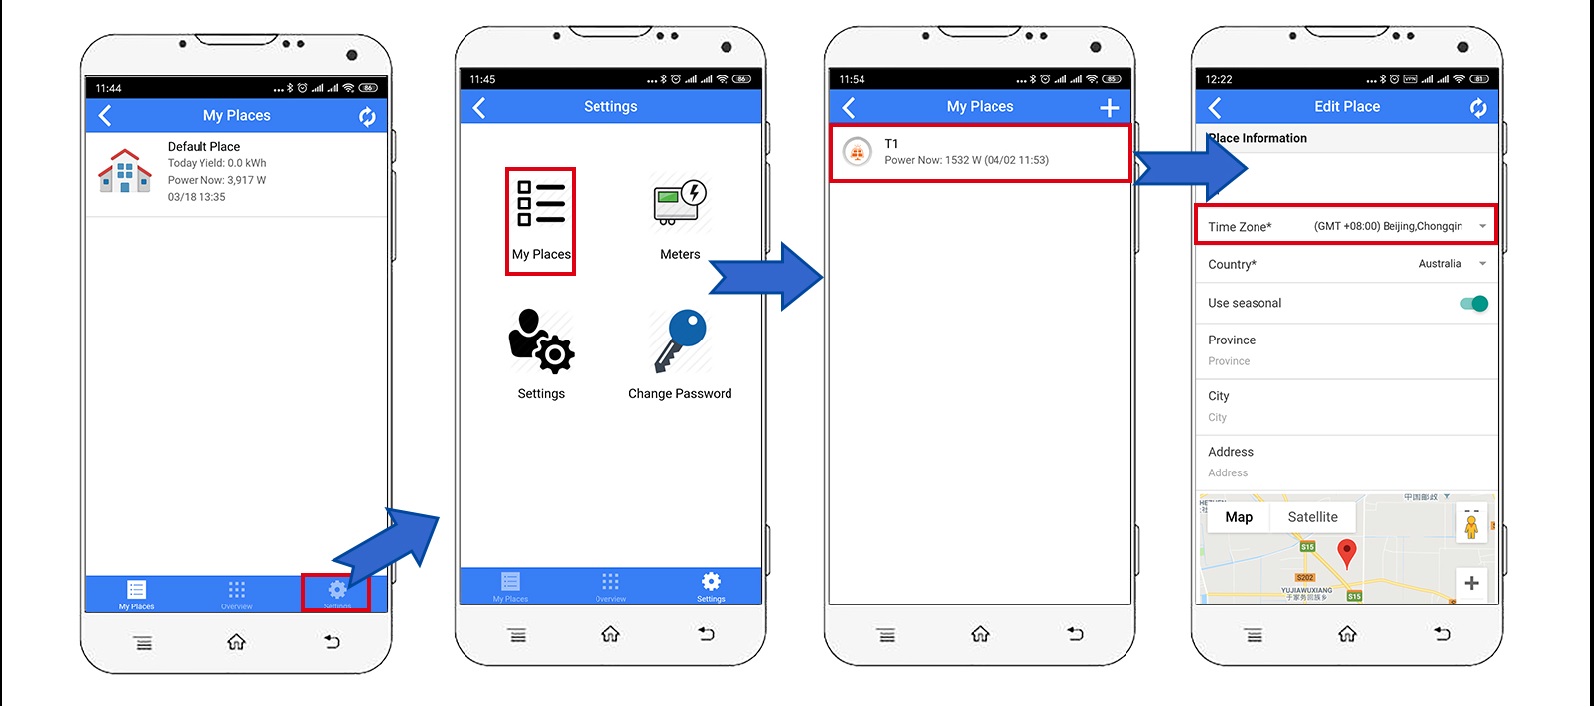
Tips: Time zone must be set according to where your meter located for correct data display and report on time basis.
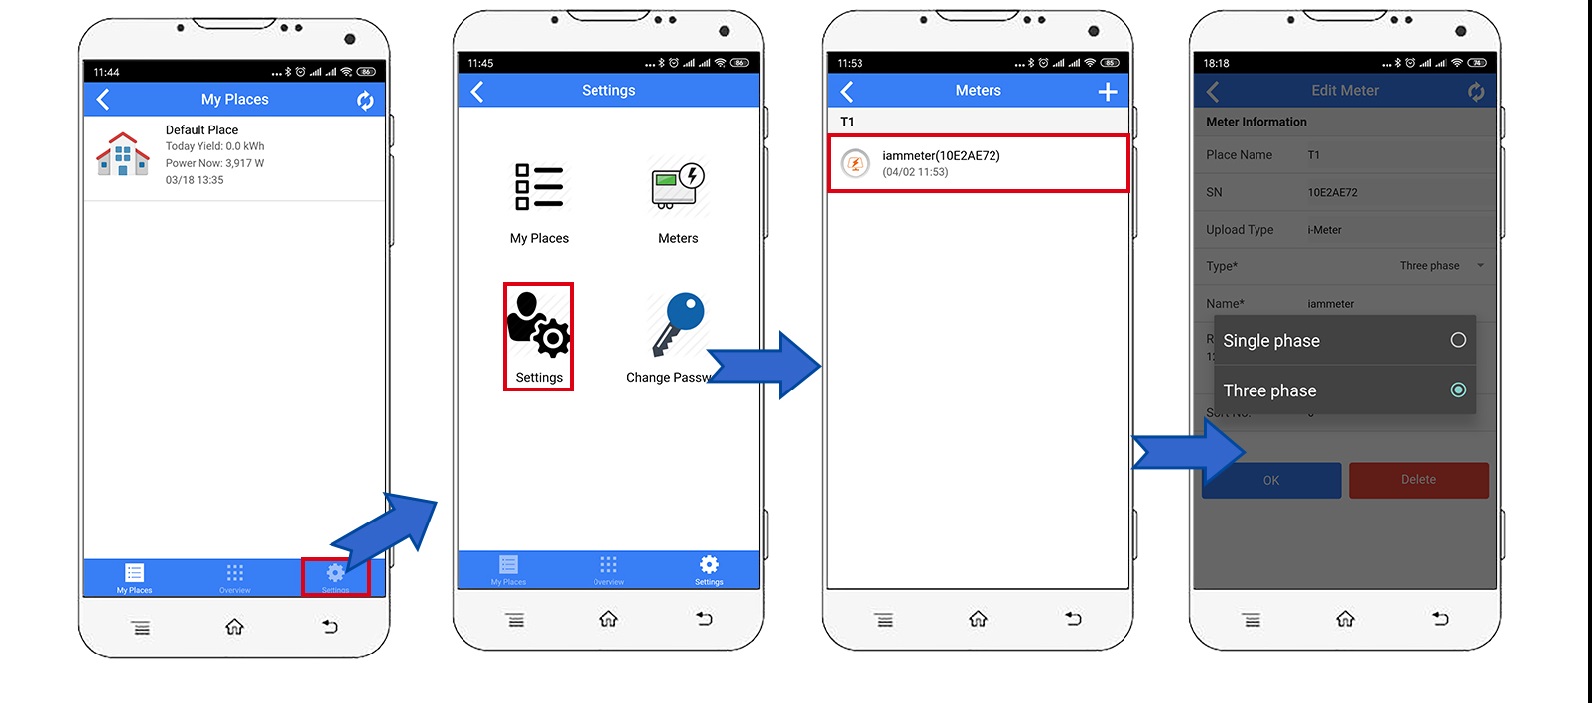
Tips: It is "single phase" as default meter type in Iammeter system. You need to change the meter "Type" as "Three Phase"
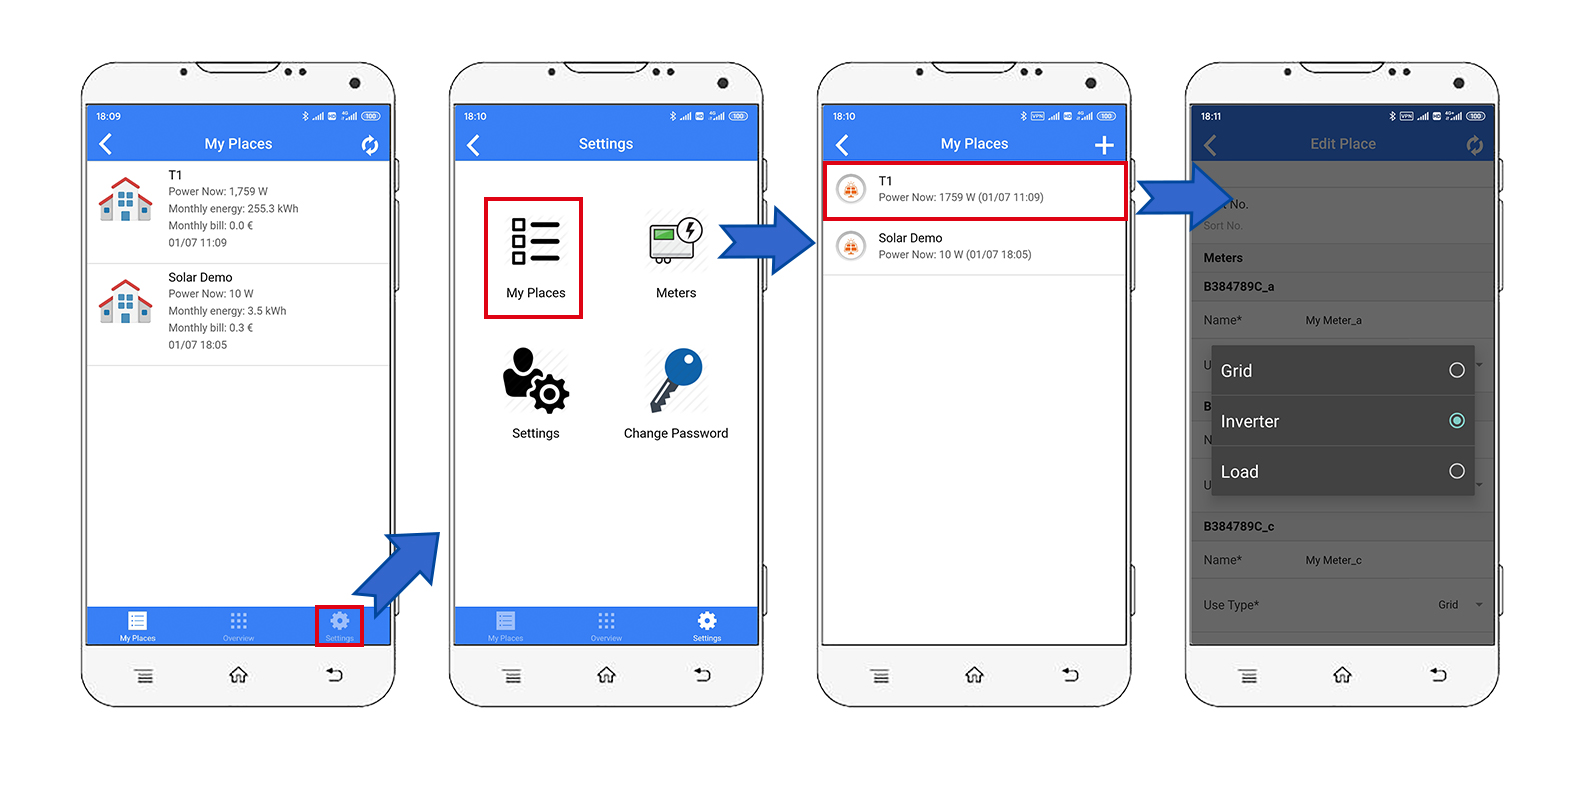
Tips: Please set the use type of each CT according to the actual CT installation. For example, if you clamp the CT of phase A onto grid, then you set its use type as "grid".
Monitor your energy consumption in IAMMETER0-Cloud
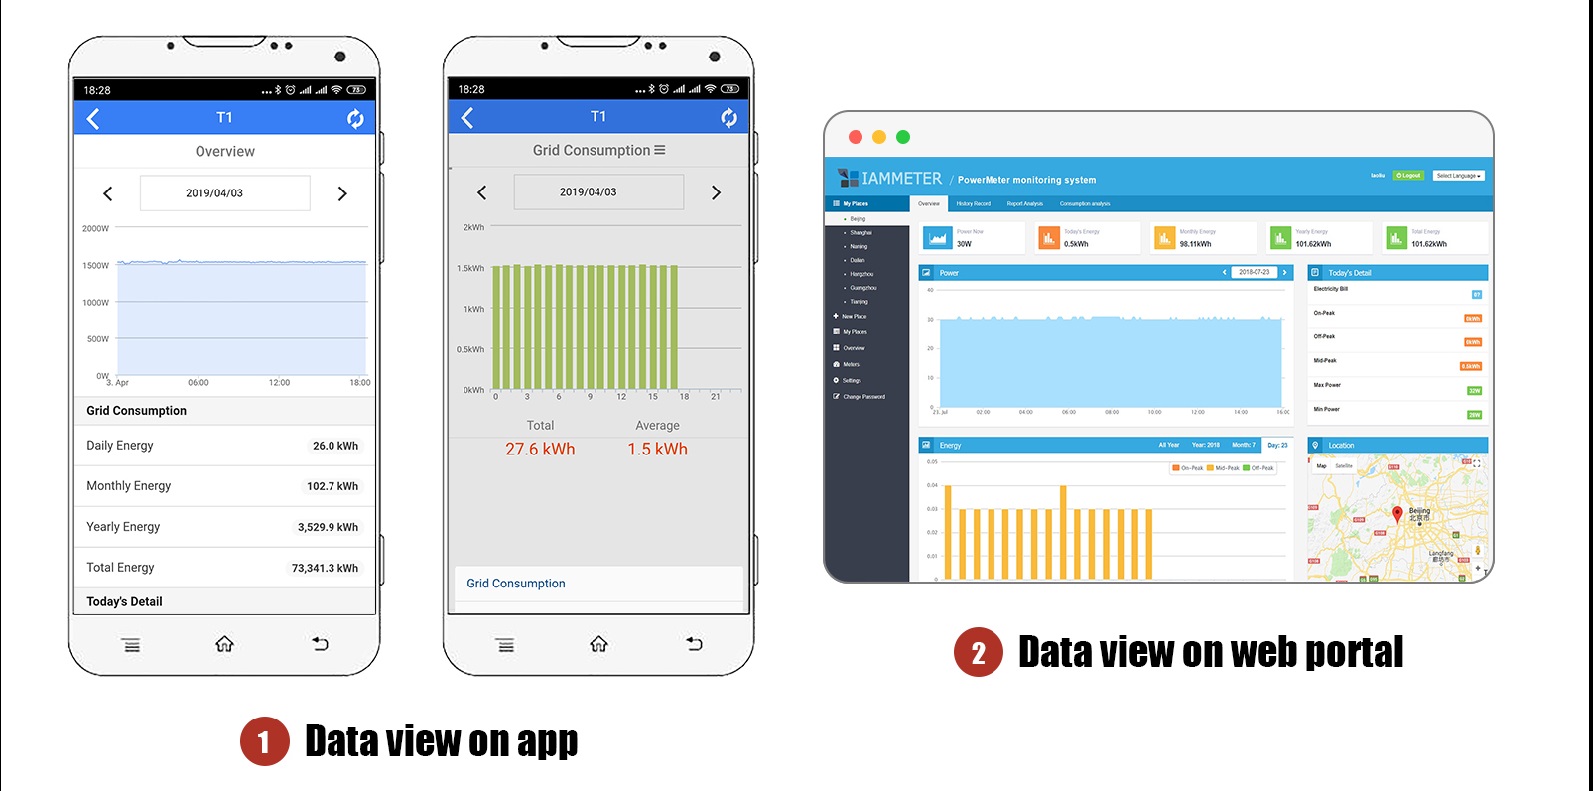
Monitor your solar PV system in IAMMETER-Cloud
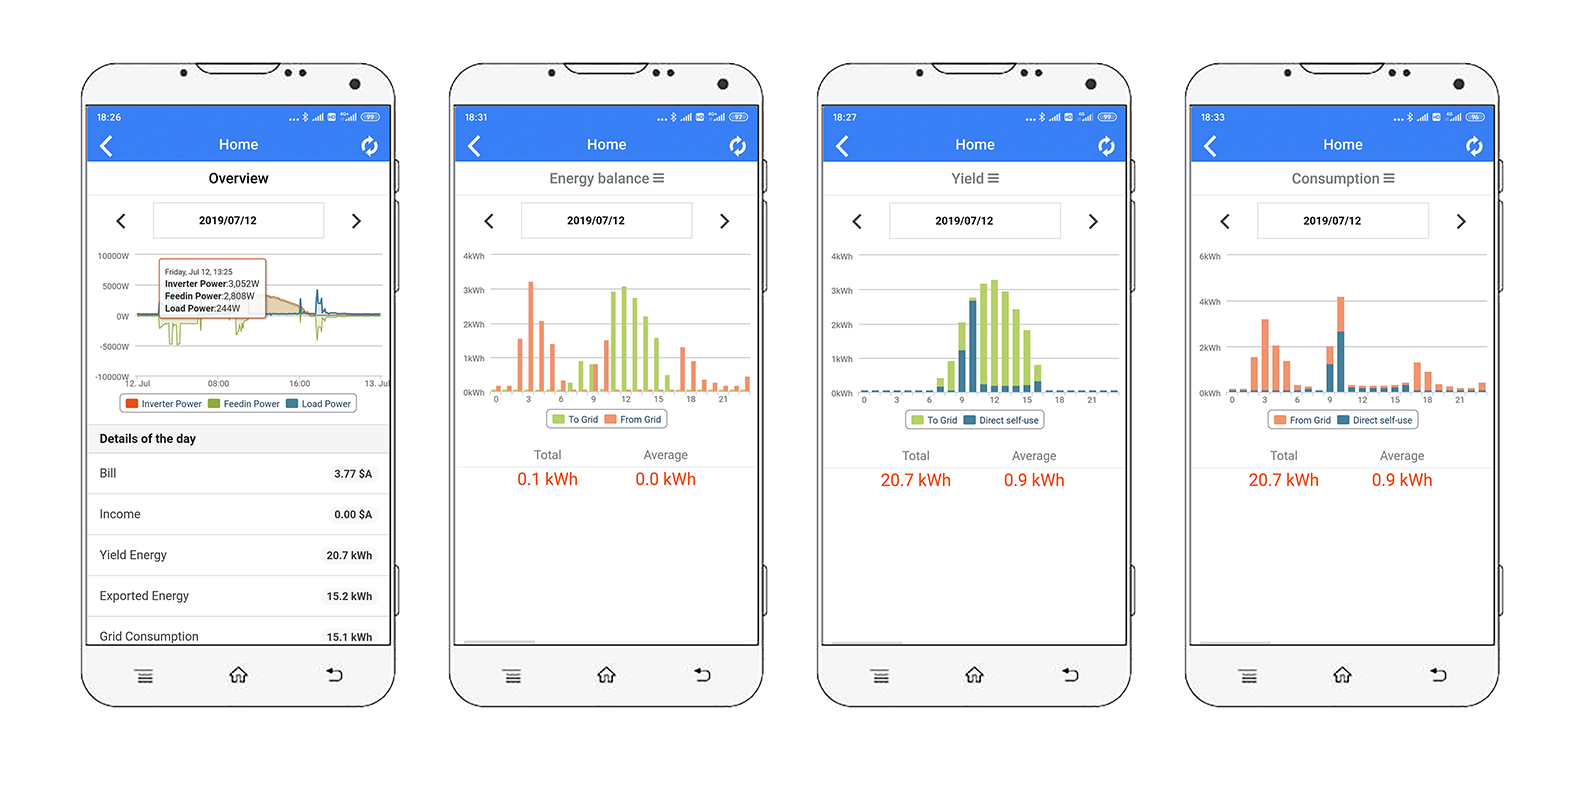
View on Mobile App
View on Web browser
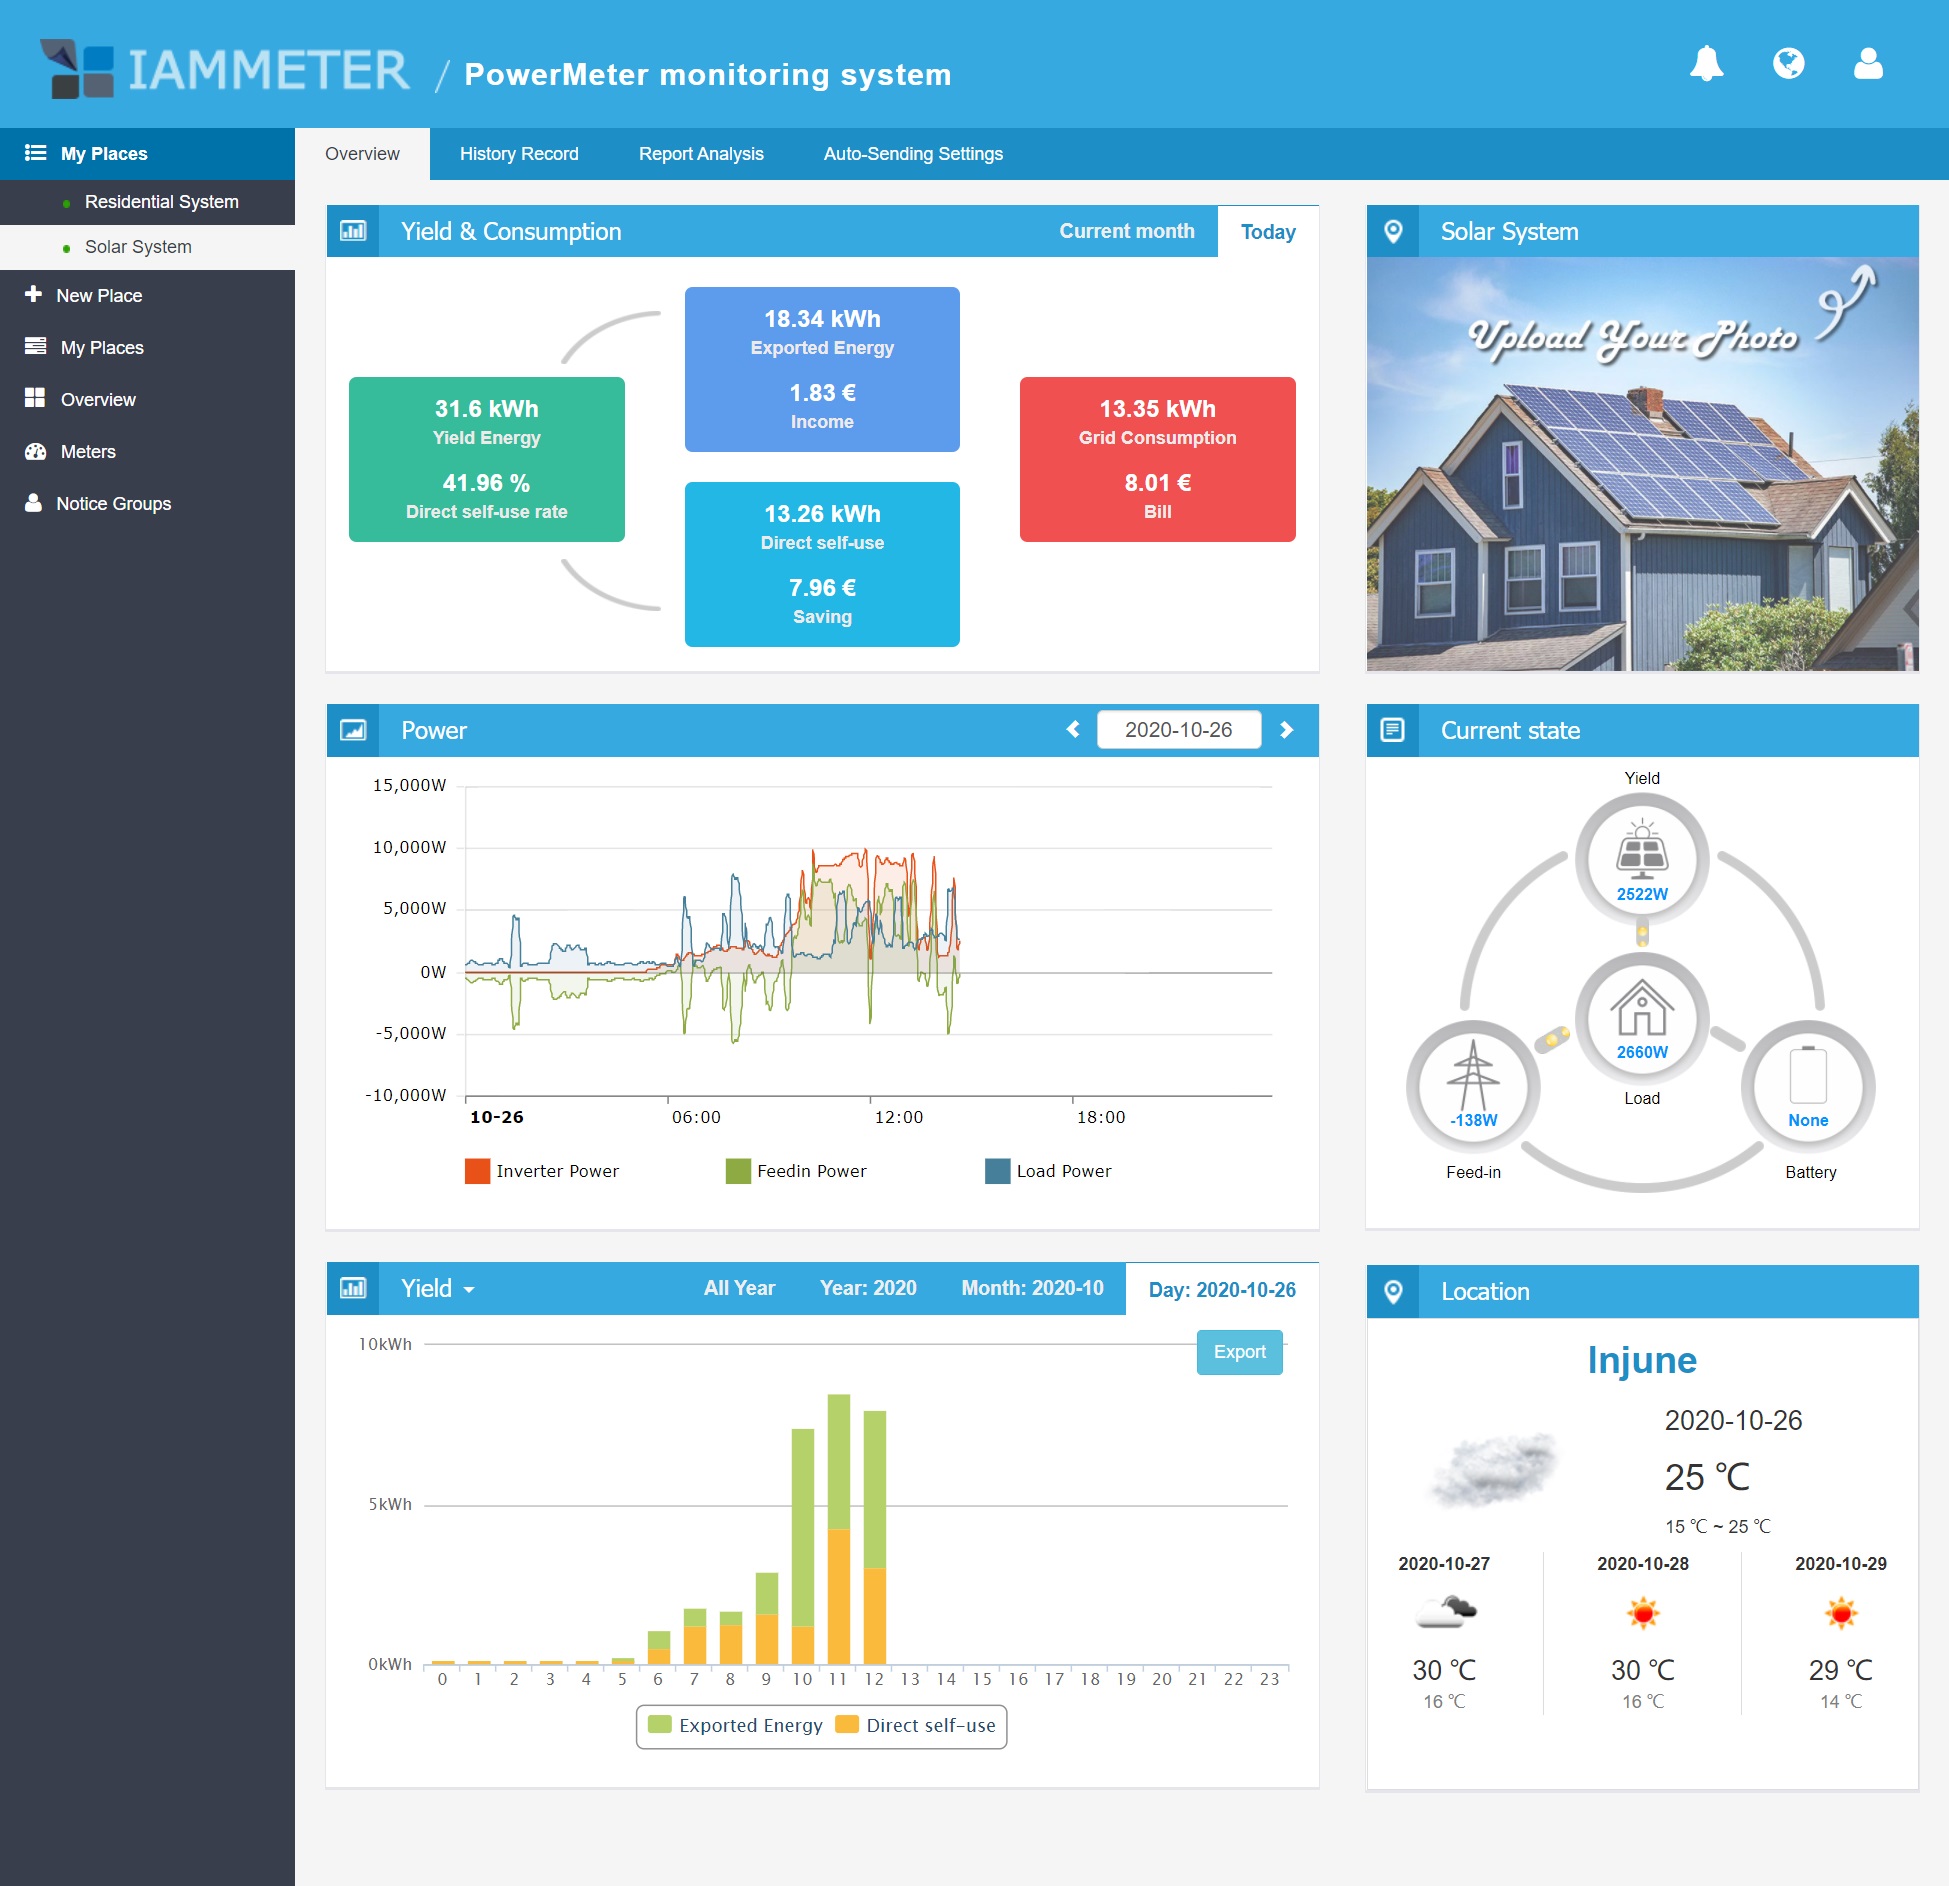
Tips: Please visit https://www.iammeter.com to login to the web portal. Same username and password as app. You can see more analysis report on web.

Integrate the wifi energy meter into Home Assistant
IAMMETER Energy monitor video tutorials
Please note that these videos tutorial only introduce a part of the functions of IAMMETER. For more detailed introductions, please refer to IAMMETER Docs
Integrate IAMMETER energy meter to third-party platforms other than Home assistant
USE the wifi energy meter in the area that not has internet access
Use the 3 phase energy meter the way you like
Monitor your solar pv system with Home Assistant
Integrate IAMMETER energy meter to third-party platform
Three Phase Wi-Fi Energy Meter (WEM3080T)
Single Phase Wi-Fi Energy Meter (WEM3080)
Three Phase Wi-Fi Energy Meter (WEM3046T)
Three Phase Wi-Fi Energy Meter (WEM3050T)