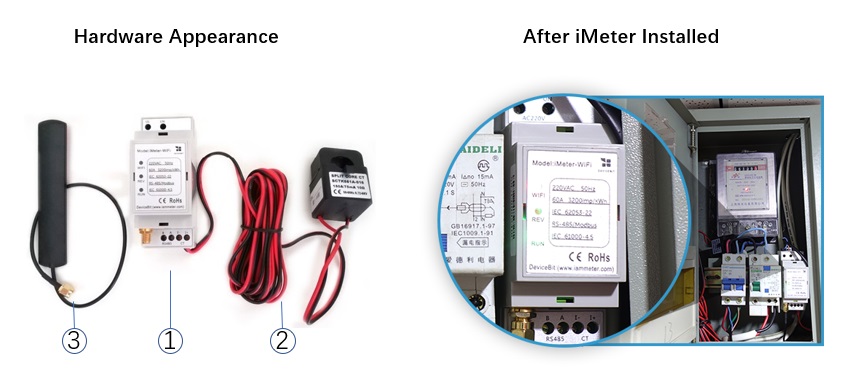
3.1 WEM3162 Quickstart
3.2 WEM3080 Quickstart
3.3 WEM3162T Quickstart
3.4 WEM3080T Quickstart
4.1 Hardware Introduction (Single Phase)
4.2 Hardware Introduction (Three Phase)
4.3 WiFi Setup
4.4 Monitor by Iammeter
4.5 Local Monitoring
4.6 Firmware Upgrade
4.7 Set Your Power Tariff
4.8 View Data by WeChat
4.9 Alert and Notification
4.10 Share your Site
4.11 Agent Function
4.12 Quick View of Energy and Bill
4.13 Set Billing Date
4.14 Analysis: Billing Report
4.15 Analysis: Energy Consumption Analysis
4.16 Analysis: Load Analysis
4.17 Analysis: Abnormal Data Analysis
4.18 Create Account for Your Users
4.19 Feedback and System Notification
4.20 Energy and Bill Forecast
4.21 Set the Time Zone
4.22 Total Saving Report of Solar PV System
5.1 WEM3080 DataSheet
5.2 WEM3080T DataSheet
7.1 Apply in Solar PV System
7.2 Use a GPRS Modem
7.3 Integrate with PVoutput
7.4 Integrate with Third-Party Server
7.5 Integrate with Solax Portal
7.6 Double CT Solution
8.1 Monitor your Solar PV System
8.2 Monitoring QuickStart(WEM3080)
8.3 Monitoring QuickStart(WEM3080T)
8.4 Overview of Solar PV system monitoring
10.1 Integrate with HomeAssistant
10.2 Integrate with openHAB
10.3 Integrate with NodeRED
10.4 Home Assistant & Grafana
11.1 Quick Start
13.1 Latest Update

Hardware Installation (Single Phase)

1. Hardware Introduction

Hardwares

Packing List:

No. Item Qty Note
1 Wi-Fi Energy Meter(WEM3080) 1 WiFi module embedded
2 Split-Core CT(Current Transformer) 1 60A, 250A, other CT ratings are optional
3 2.4G Antenna 1

2 Installation

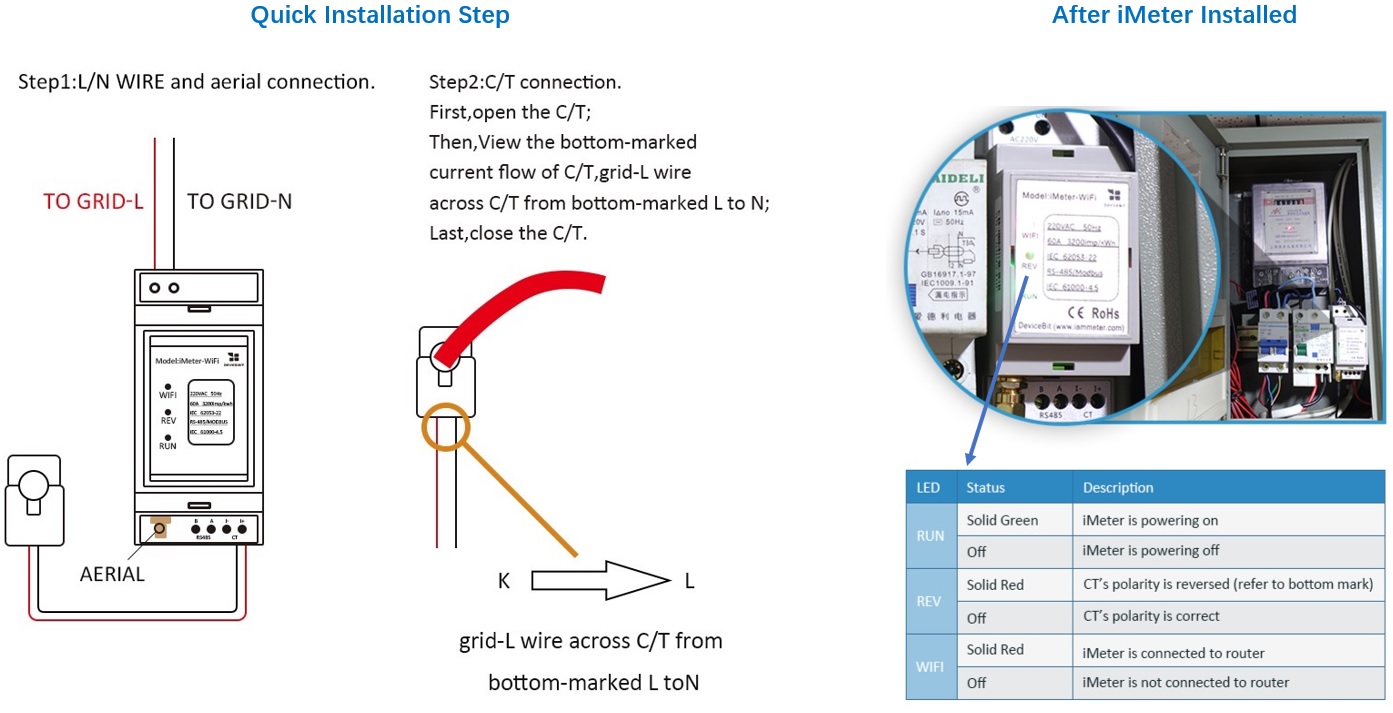
Note: The electrician license maybe required for installer according to your local law.

Quick and easy installation by following below pictures:

Installation

Note

If you have a WeChat account, please follow our IAMMETER WeChat public ID.

iammeter.jpg