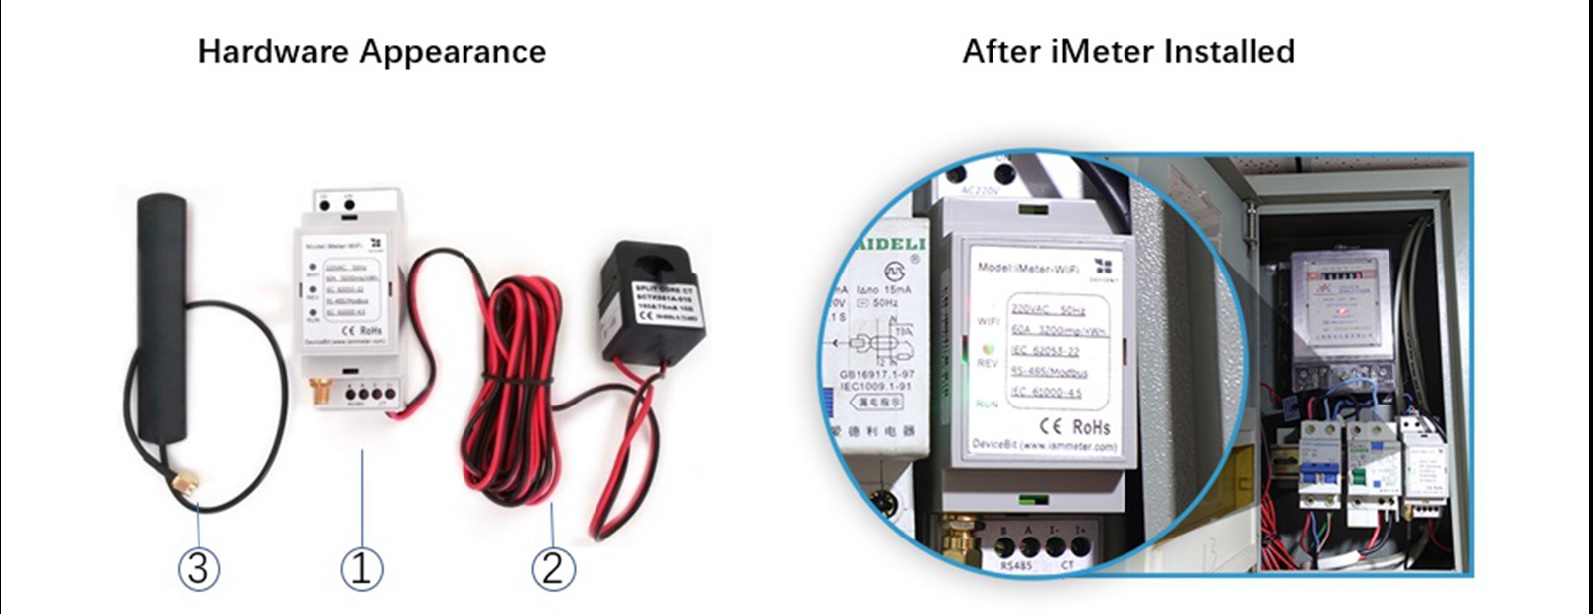
3.1 WEM3162 Quickstart
3.2 WEM3080 Quickstart
3.3 WEM3162T Quickstart
3.4 WEM3080T Quickstart
4.1 Hardware Introduction (Single Phase)
4.2 Hardware Introduction (Three Phase)
4.3 WiFi Setup
4.4 Monitor by Iammeter
4.5 Local Monitoring
4.6 Firmware Upgrade
4.7 Set Your Power Tariff
4.8 View Data by WeChat
4.9 Alert and Notification
4.10 Share your Site
4.11 Agent Function
4.12 Quick View of Energy and Bill
4.13 Set Billing Date
4.14 Analysis: Billing Report
4.15 Analysis: Energy Consumption Analysis
4.16 Analysis: Load Analysis
4.17 Analysis: Abnormal Data Analysis
4.18 Create Account for Your Users
4.19 Feedback and System Notification
4.20 Energy and Bill Forecast
4.21 Set the Time Zone
4.22 Total Saving Report of Solar PV System
5.1 WEM3080 DataSheet
5.2 WEM3080T DataSheet
7.1 Apply in Solar PV System
7.2 Use a GPRS Modem
7.3 Integrate with PVoutput
7.4 Integrate with Third-Party Server
7.5 Integrate with Solax Portal
7.6 Double CT Solution
8.1 Monitor your Solar PV System
8.2 Monitoring QuickStart(WEM3080)
8.3 Monitoring QuickStart(WEM3080T)
8.4 Overview of Solar PV system monitoring
10.1 Integrate with HomeAssistant
10.2 Integrate with openHAB
10.3 Integrate with NodeRED
10.4 Home Assistant & Grafana
11.1 Quick Start
13.1 Latest Update

WEM3162 Quickstart

PDF Download

1. Hardware Installation

Hardware Installation

Standard Inclusion:

No. Item Qty Remark
1 Wi-Fi Energy Meter 1 Wi-Fi Module Embedded
2 Split-core CT (Current Transformer) 1 60A and 230A CT optional
3 2.G Antenna 1

2. Typical Wiring Diagram

Note: The break for the meter is optional. You can connect the meter directly to the main breaker or without the breaker.

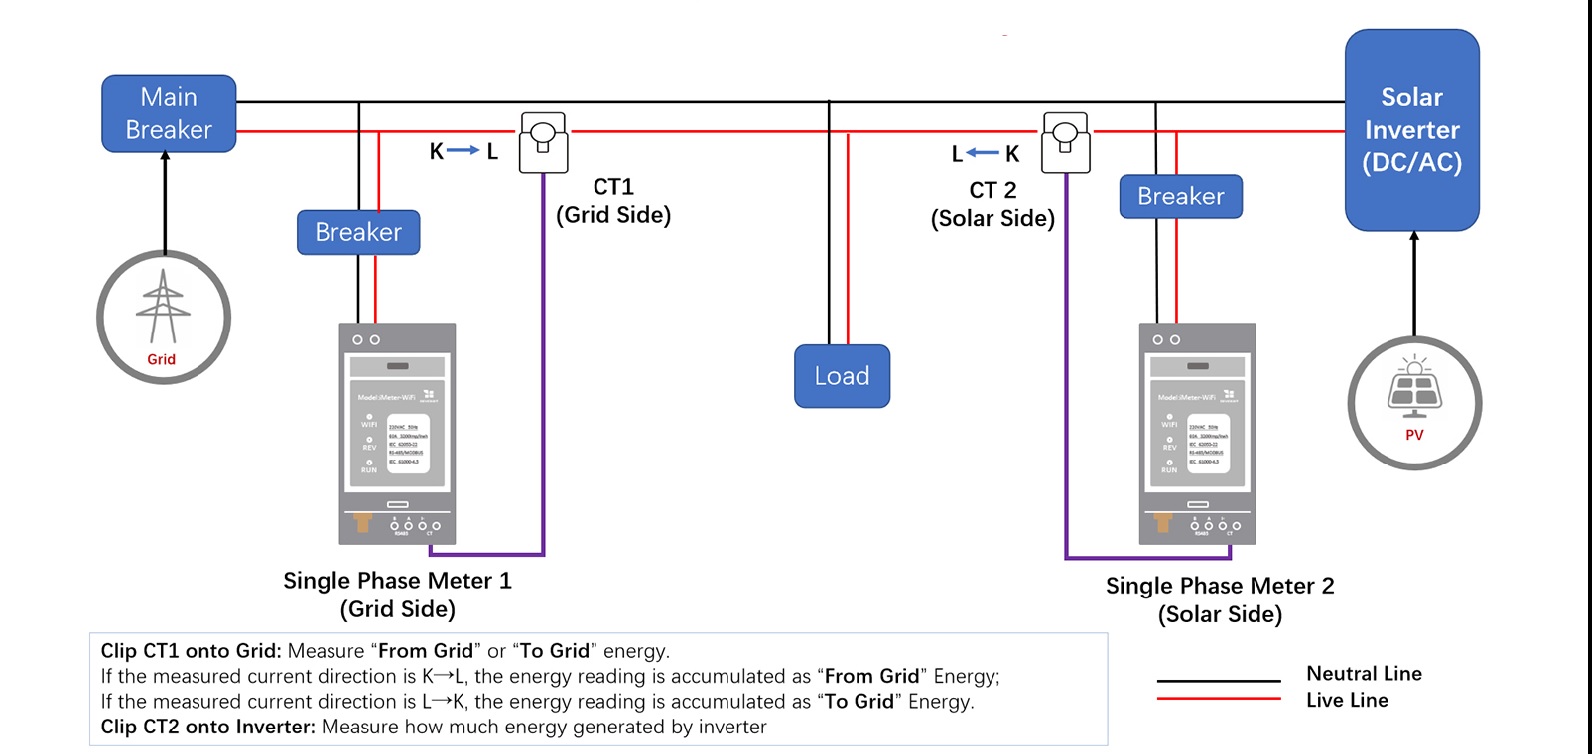
Wiring in a Single Phase Solar PV System

Wiring 1

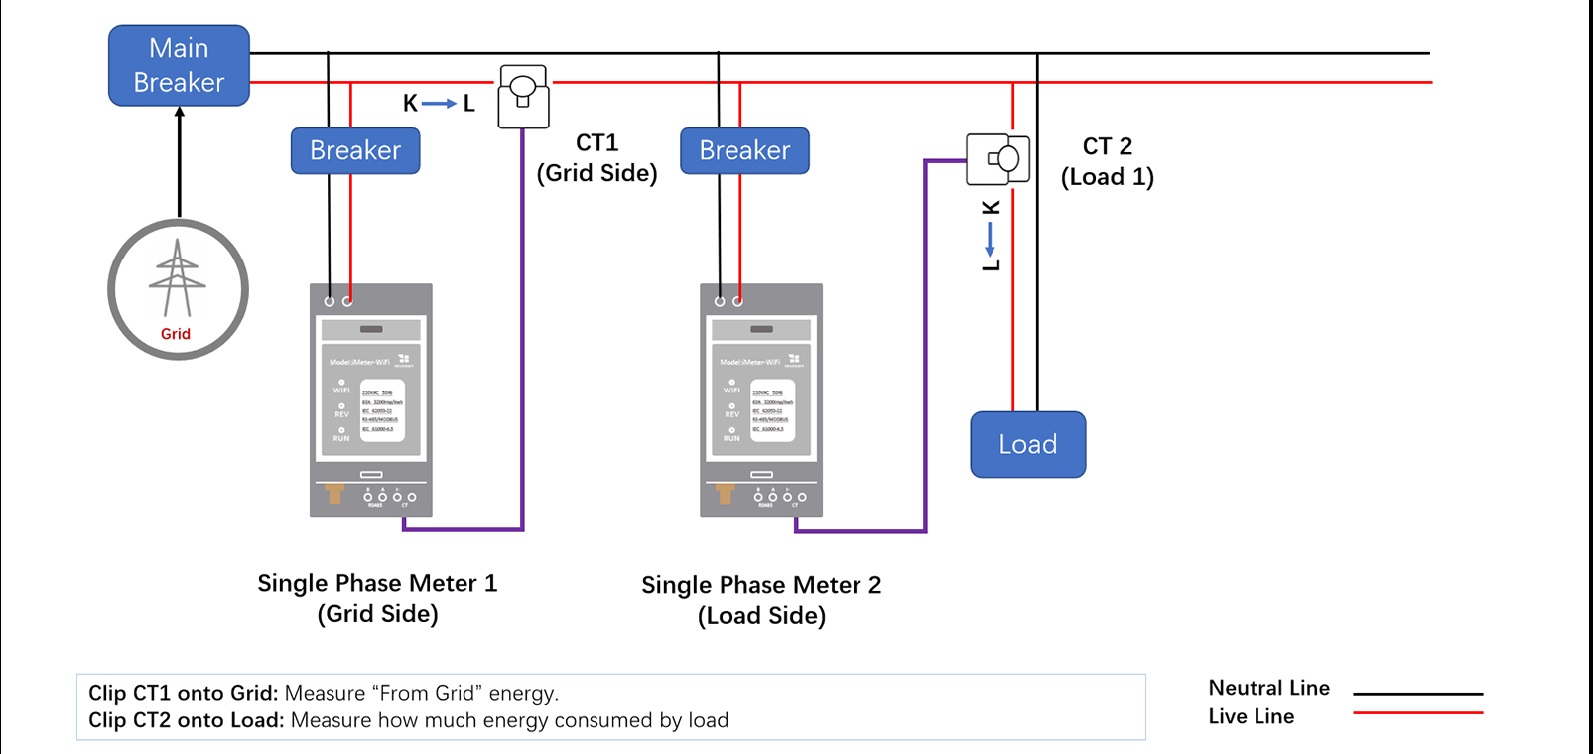
Wiring in a Single Phase Residential Electricity System

Wiring 2

3. Wi-Fi Setup

Wi-Fi Setup

4. Sign up by Mobile App

Sign up

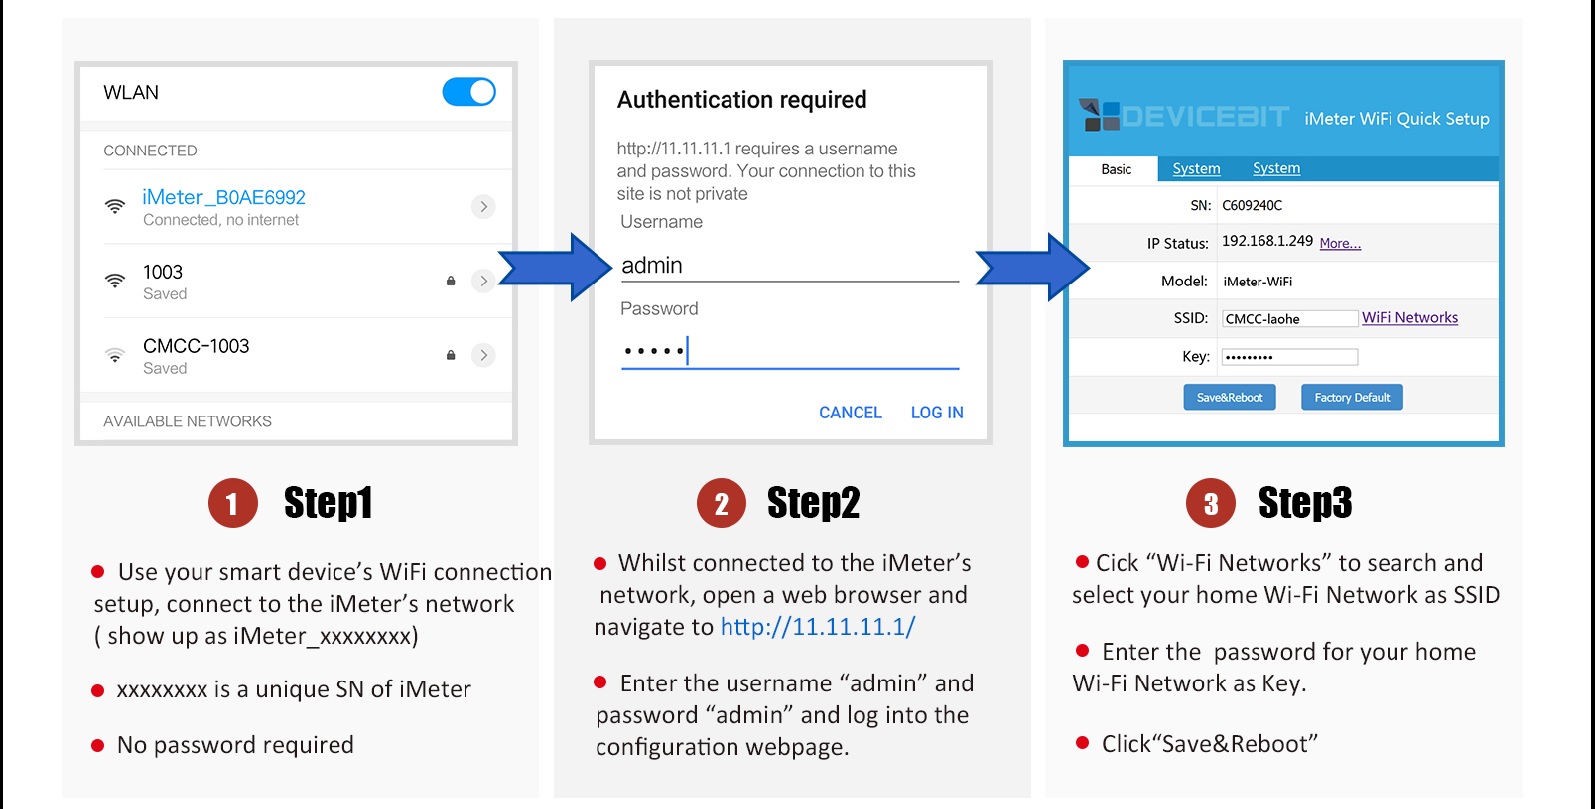
Tips: SN is the unique Serial Number of your iMeter. You can copy it from the iMeter's access point signal (iMeter_xxxxxxxx, xxxxxxxx is the SN).

5. Set the Time Zone

Time Zone

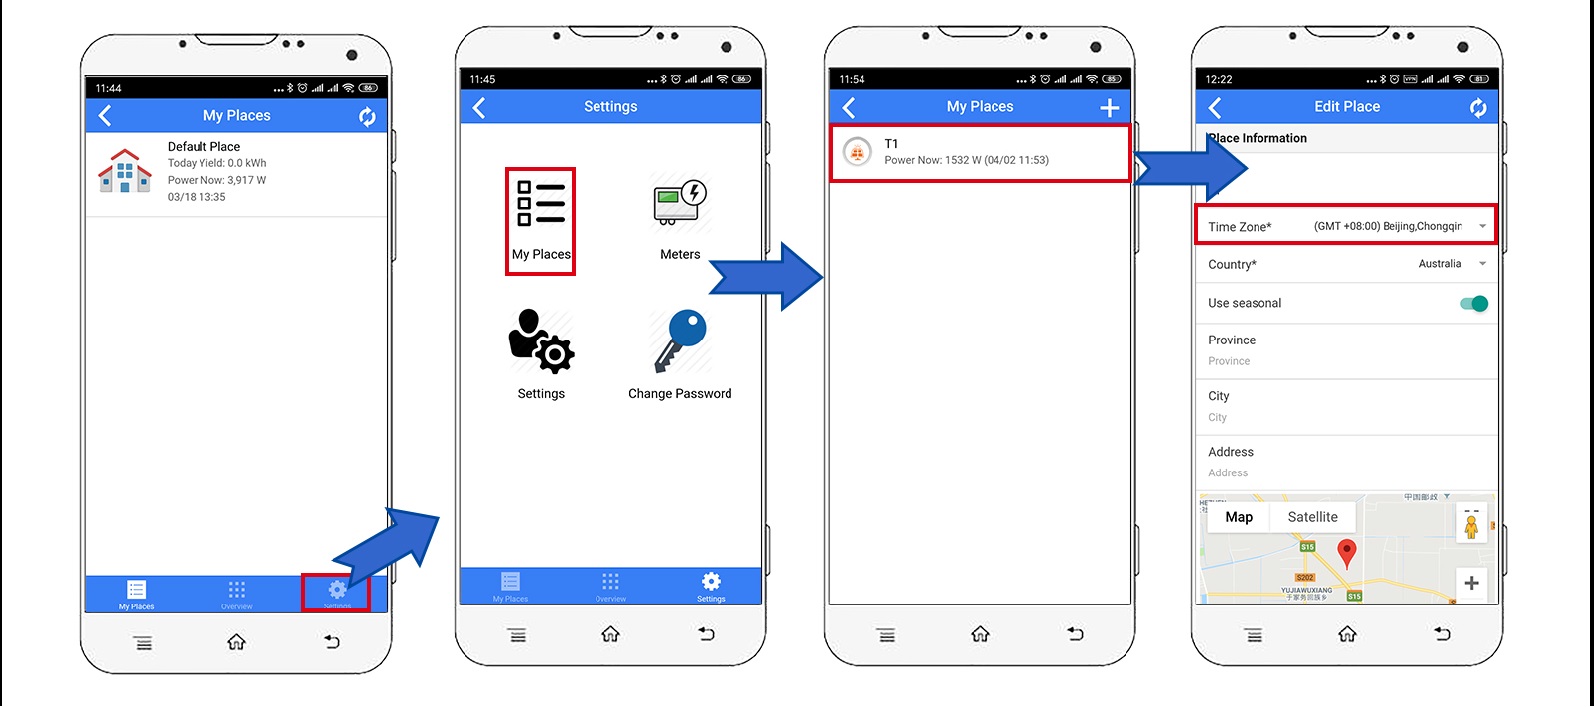
Tips: Time zone must be set according to where your meter located for correct data display and report on time basis.

6. Set the Use Type of Each CT

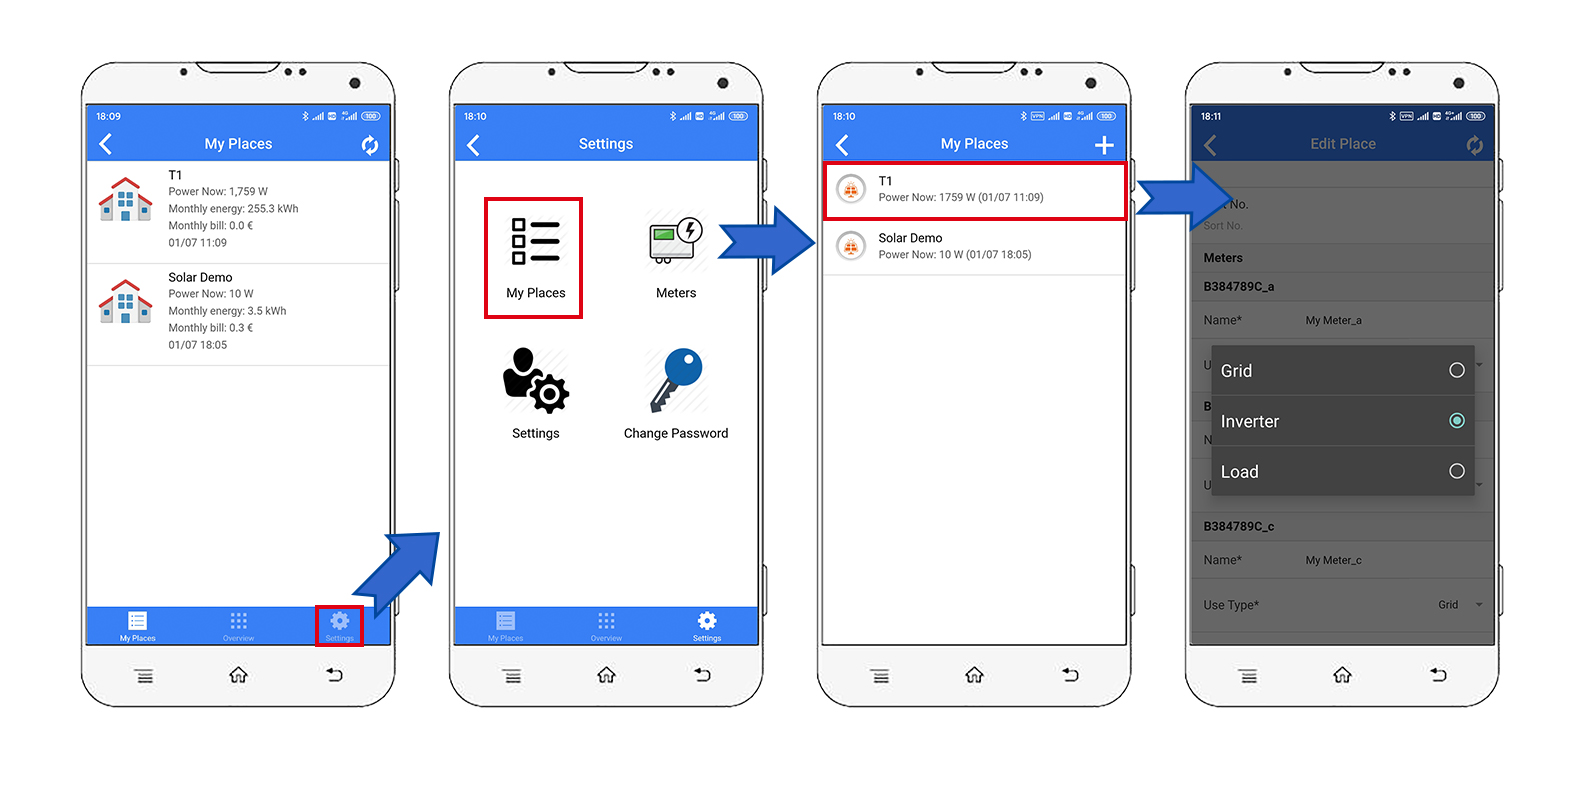
Tips: Please set the use type of each CT according to the actual CT installation. For example, if you clamp the CT of phase A onto grid, then you set its use type as "grid".

7. View the Data

View the data

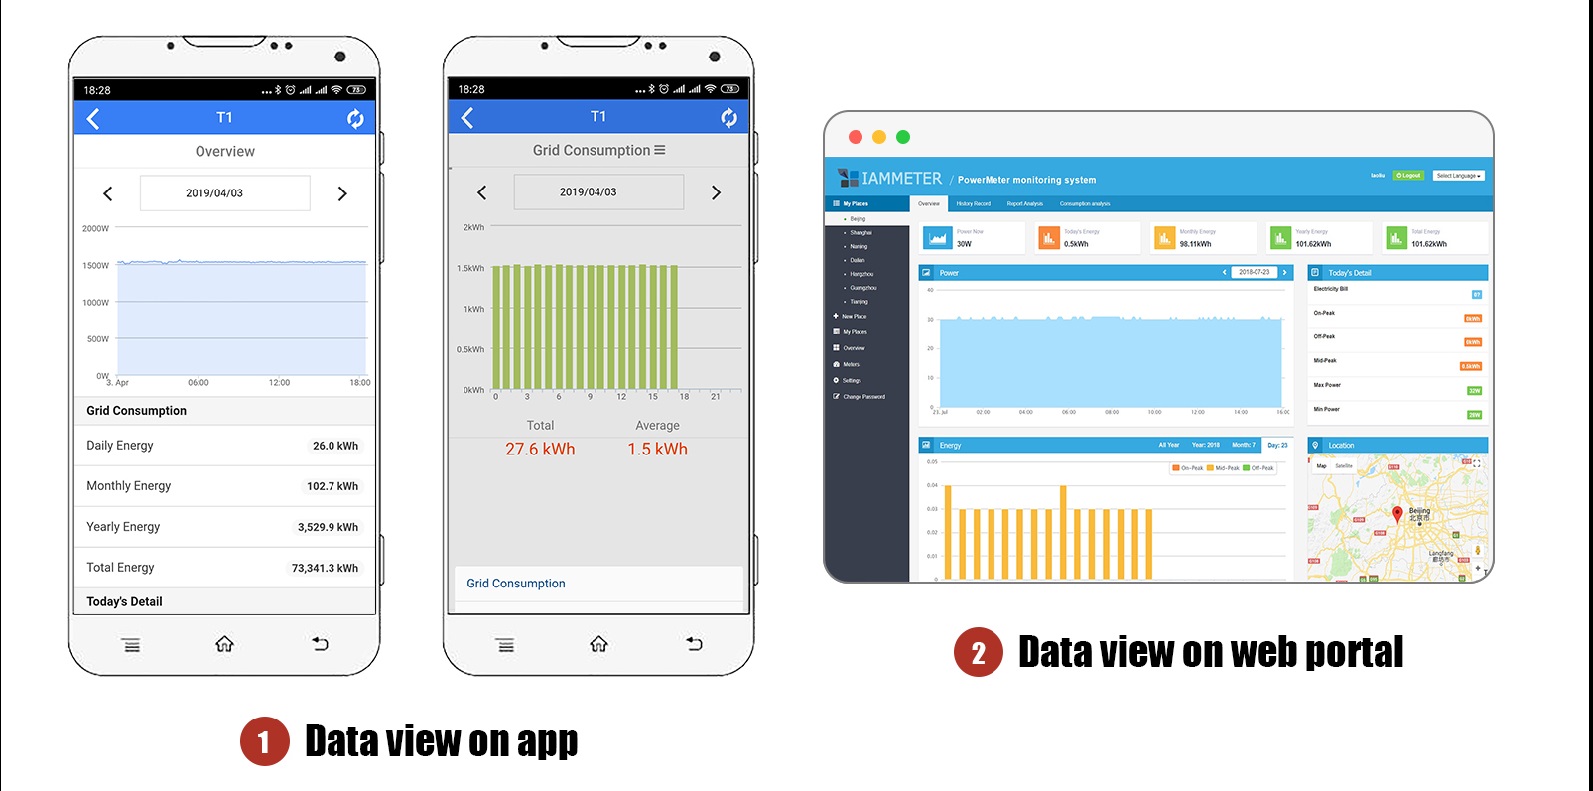
Tips: Please visit https://www.iammeter.com to login to the web portal. Same username and password as app. You can see more analysis report on web.

Note

If you have a WeChat account, please follow our IAMMETER WeChat public ID.

iammeter.jpg