Home
>
Resources
>
Documents
>
simulate a load profile and integrate the simulator in the Home assistant
quick start : simulate a load profile in this simulator
Q: Why do we need to simulate the load profile in this simulator? A: If you can simulate the load profile as accurately as real, you will be able to do the experiment on this simulator. Find a proper way to manipulate the controllable load and utilize the solar PV output more efficiently.
This tutorial will take about 10 mins. To show you how to run this simulator and how to simulate a load profile in this simulator.
Welcome to let us know your thoughts here Integrate a virtual 3-phase energy meter (open source) into HA,use it to optimize your solar pv system
There are some basic introductions to the simulator. You can read these first, or jump to the next chapter directly .(Reading this chapter or not will not affect you to operate the simulator regards to the next chapter).
The simulator is an open source code ,the code is here IAMMETER`simulator in GitHub
You can download the code and run it directly (needs Download & install .NET Runtime 6.0.10 first).
Run the simulator from source code
We also provide the docker image, you can also run this simulator in docker.
Run the simulator from the docker
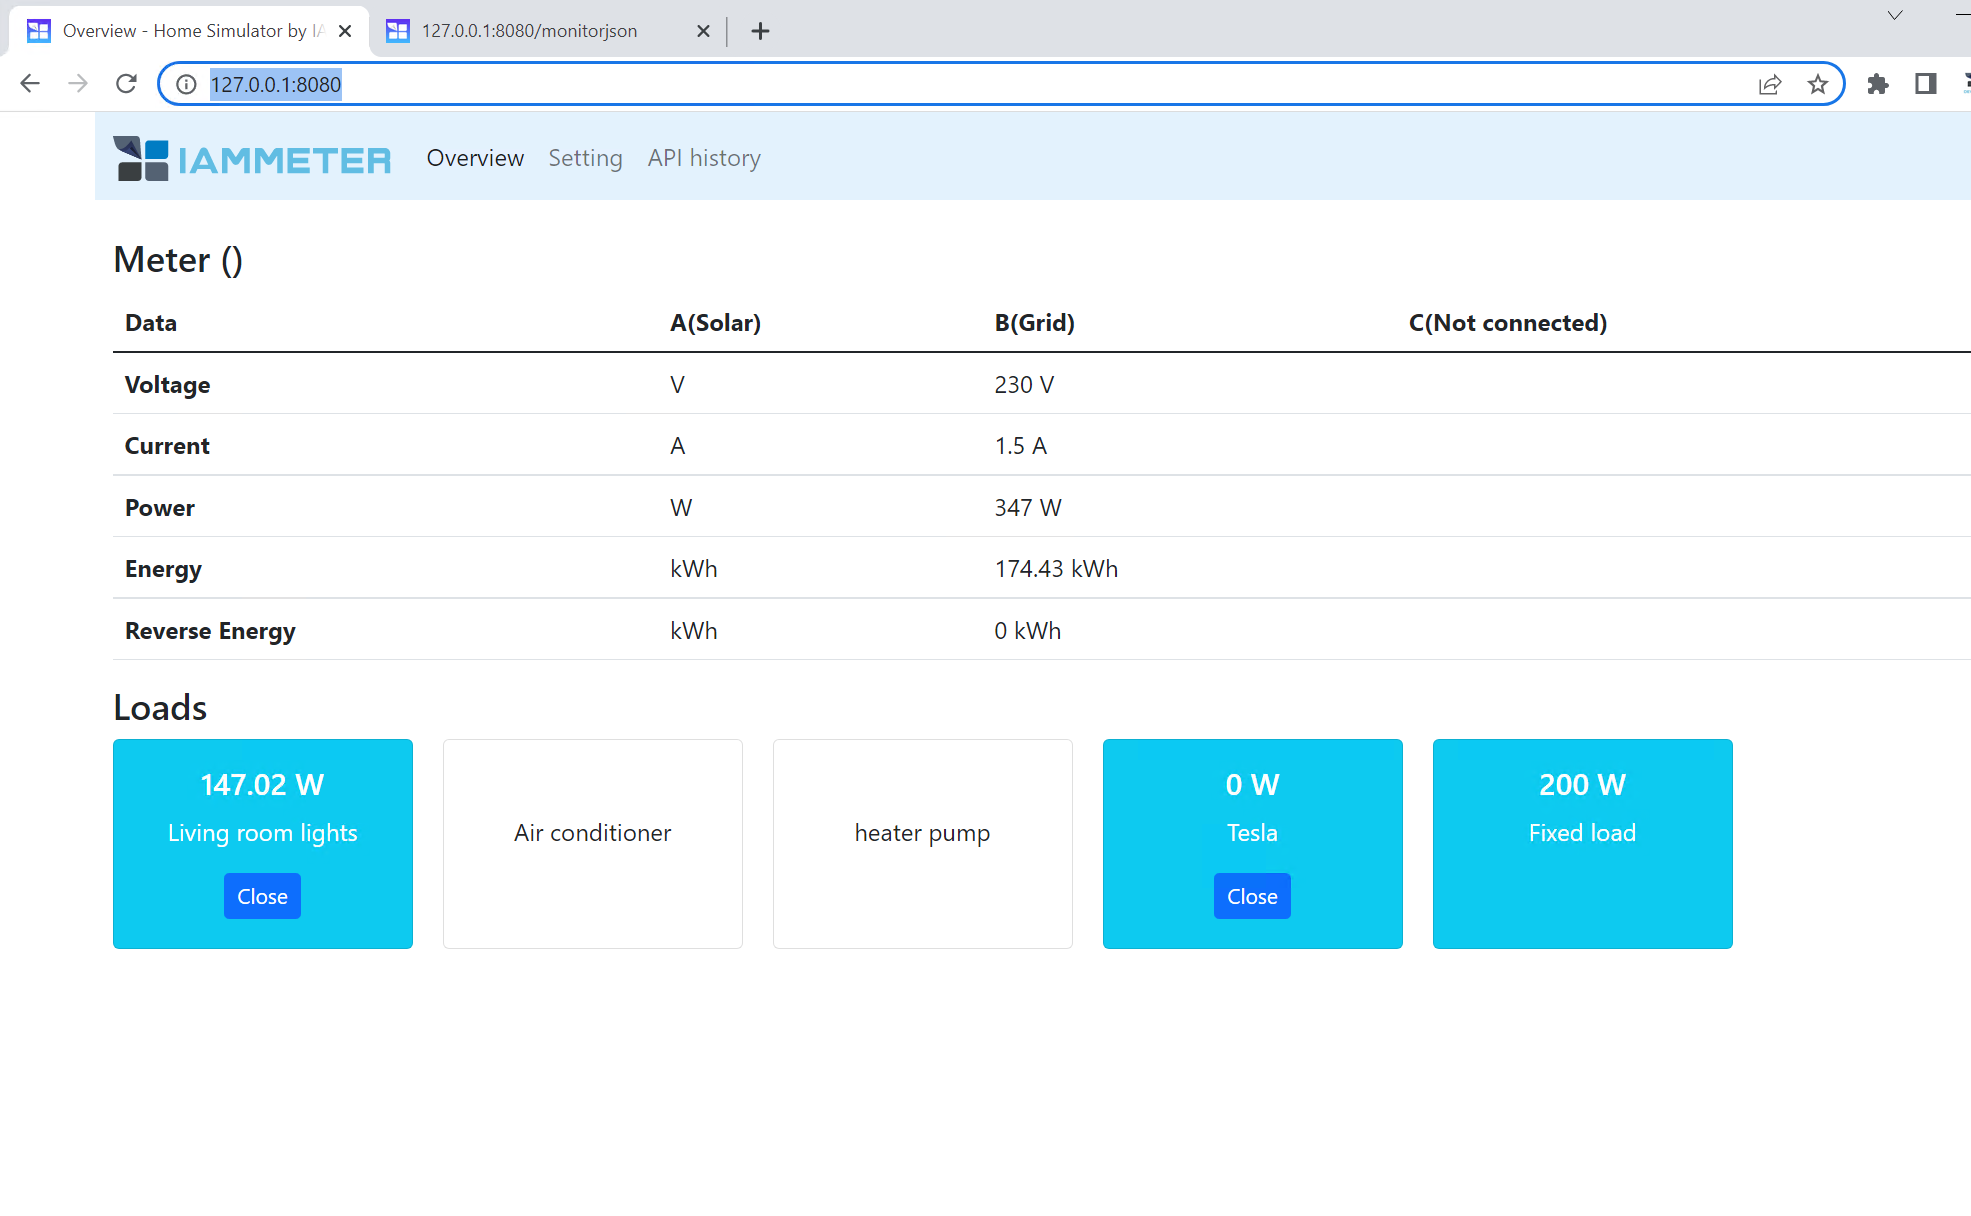
Visit http://localIP:8080
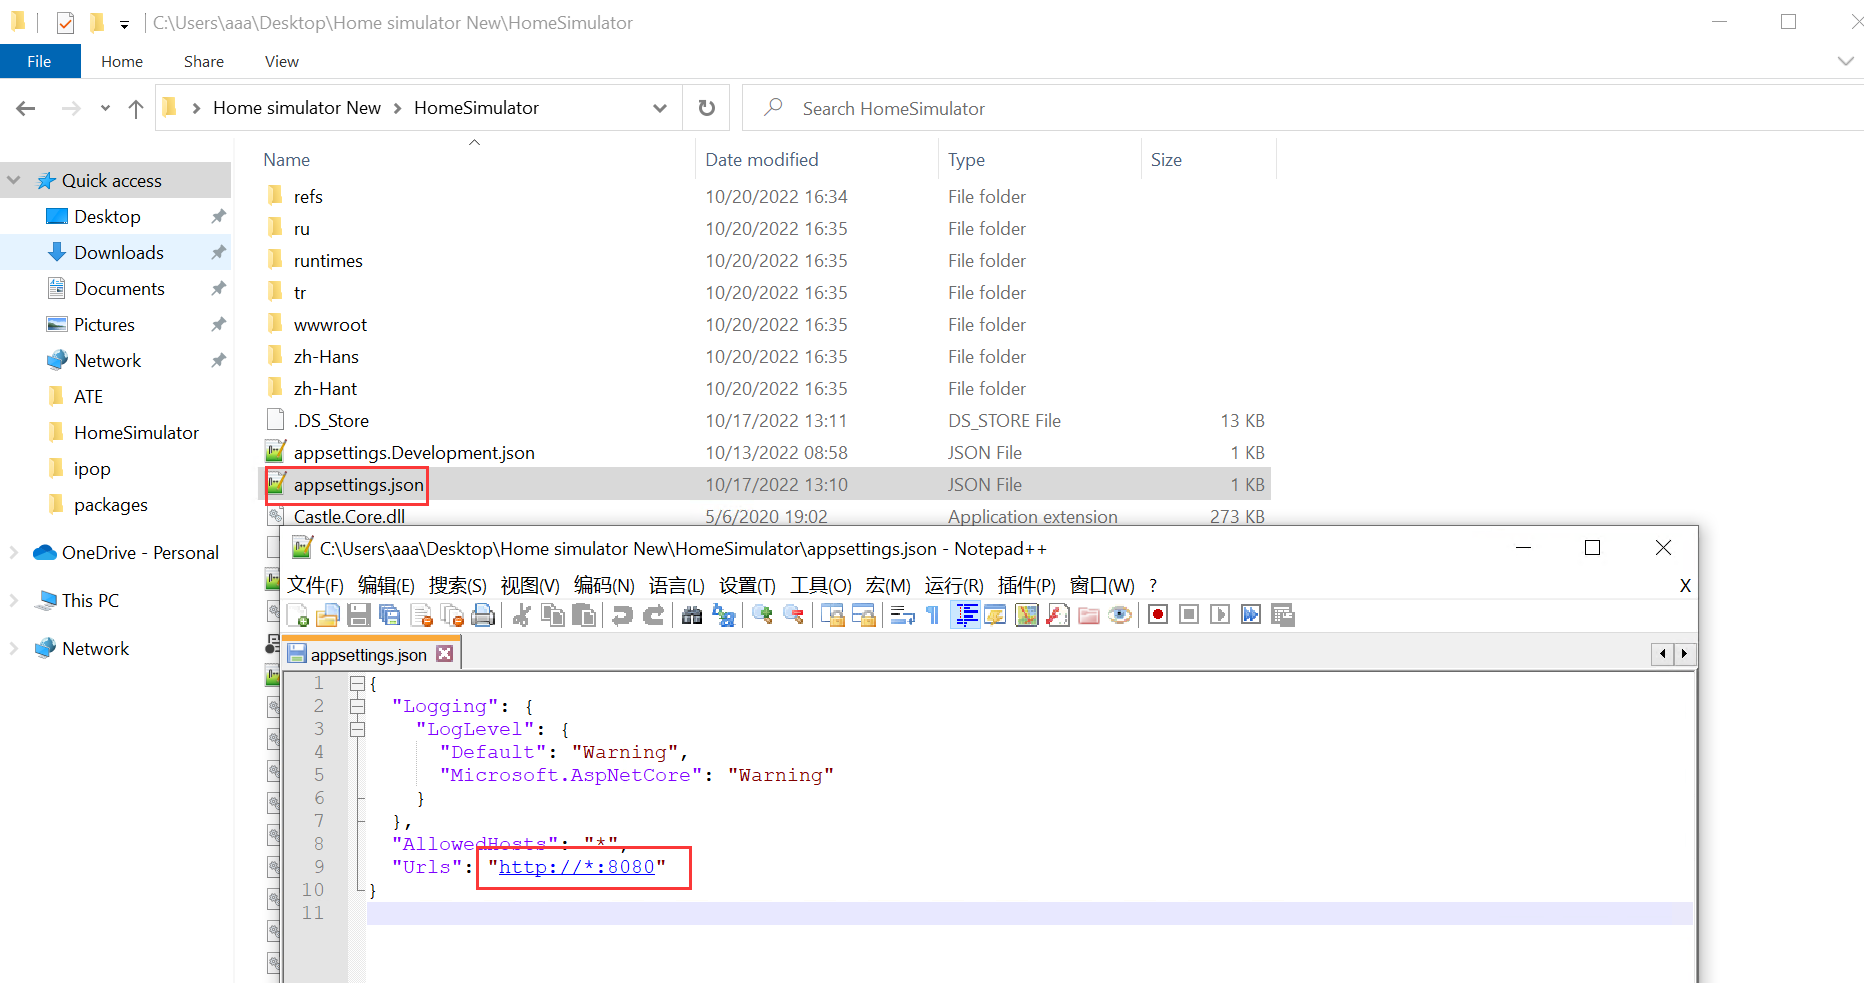
The port 8080 can be defined in the file of "appsettings.json"
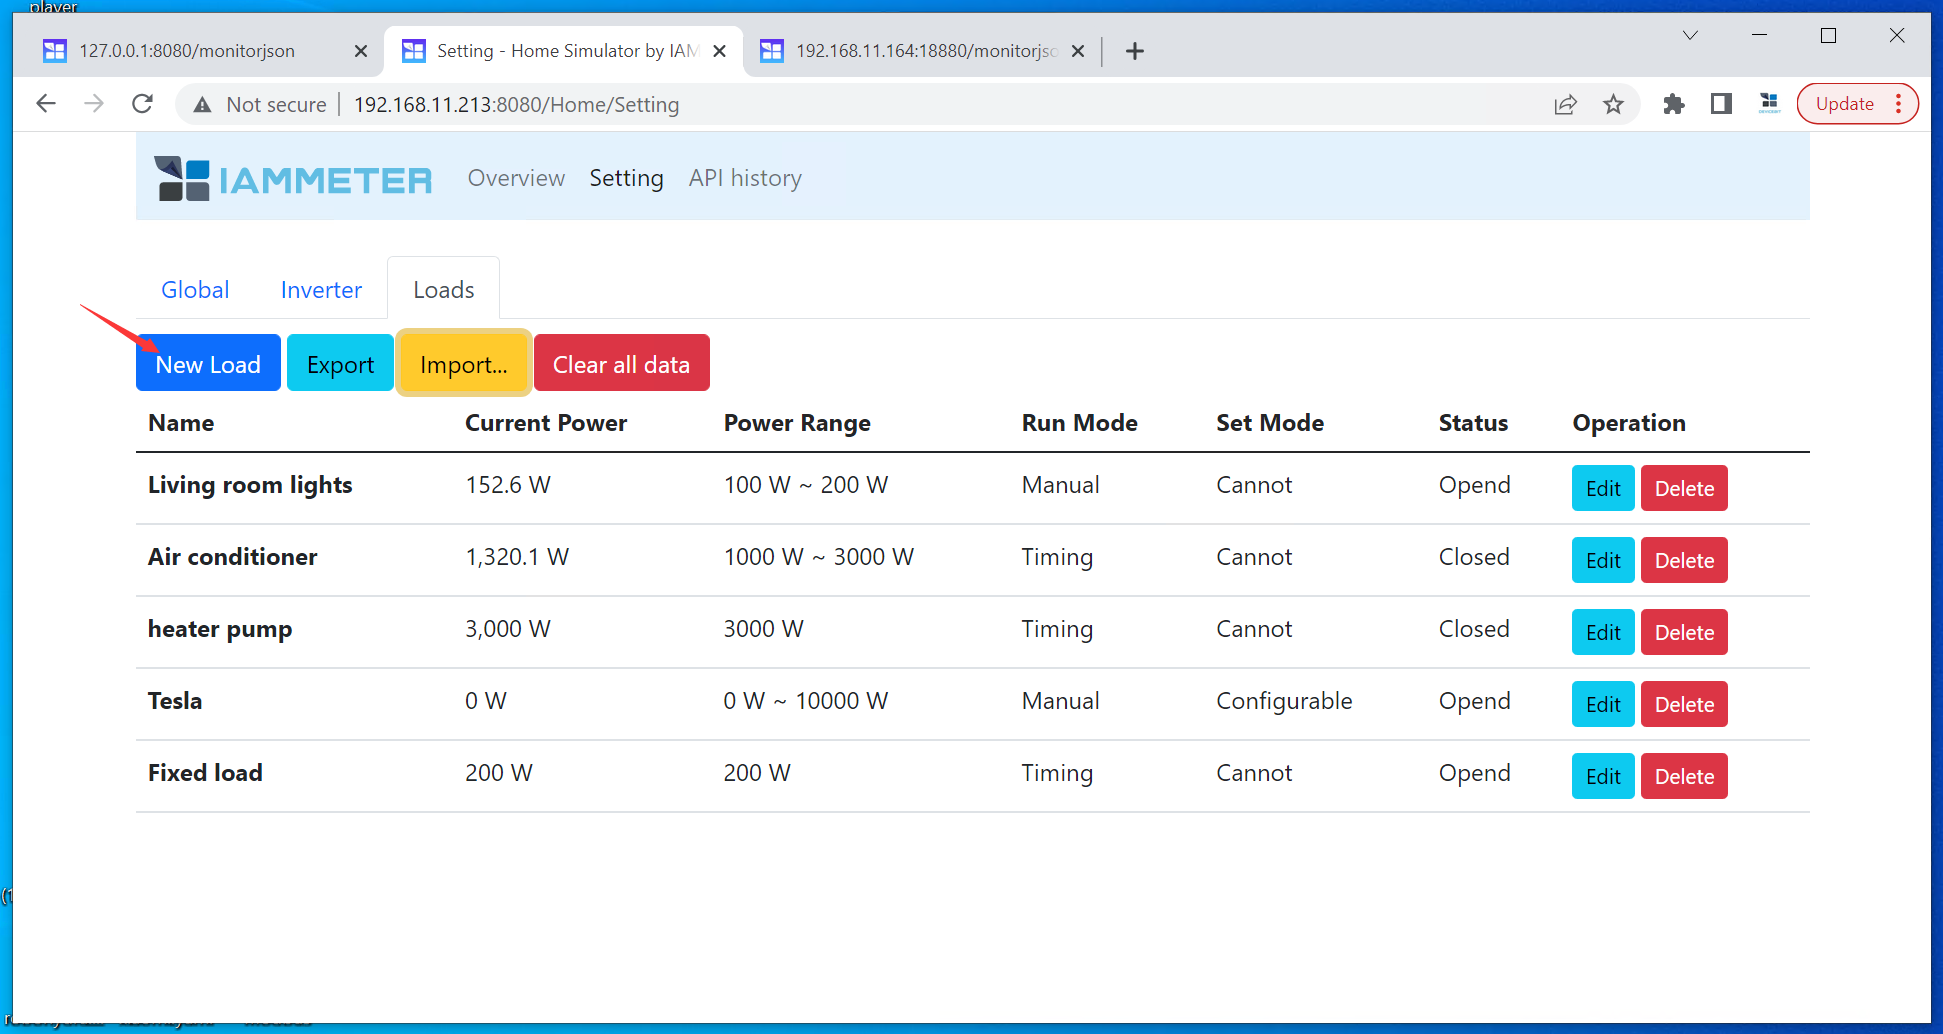
The simulator also supports the API of "monitorjson", like the real WEM3080T
When you change the load power from the setting, besides the overview dashboard of the simulator, this API can also be used to check the power varying in phase B.

We provide some load profile configurations here. You can download and import them to your simulator directly.
https://github.com/lewei50/iammeter-simulator
After you have described your load profile in the simulator, you can export the configuration in a JSON file. Others can also import this JSON file directly.
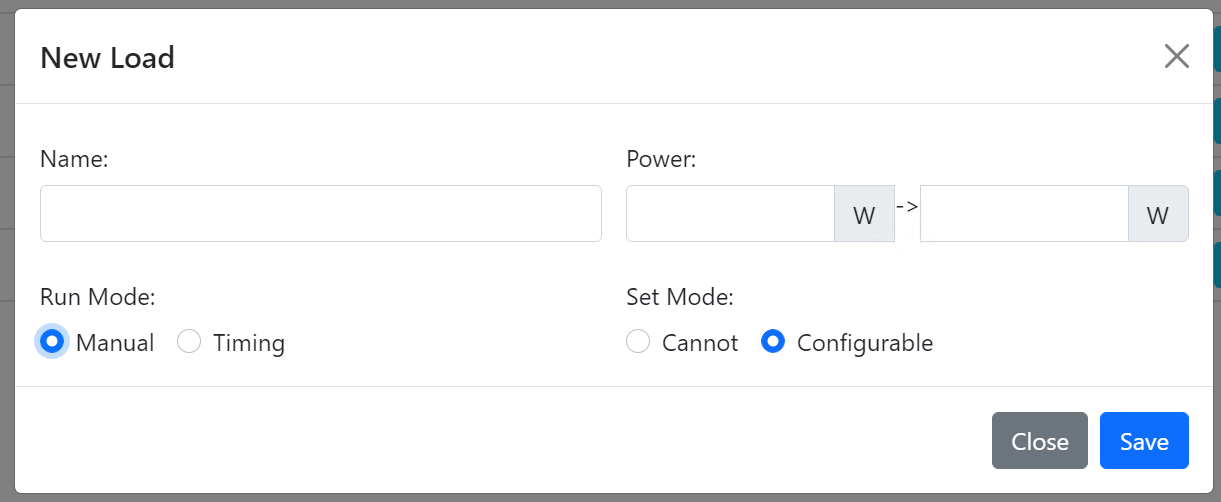
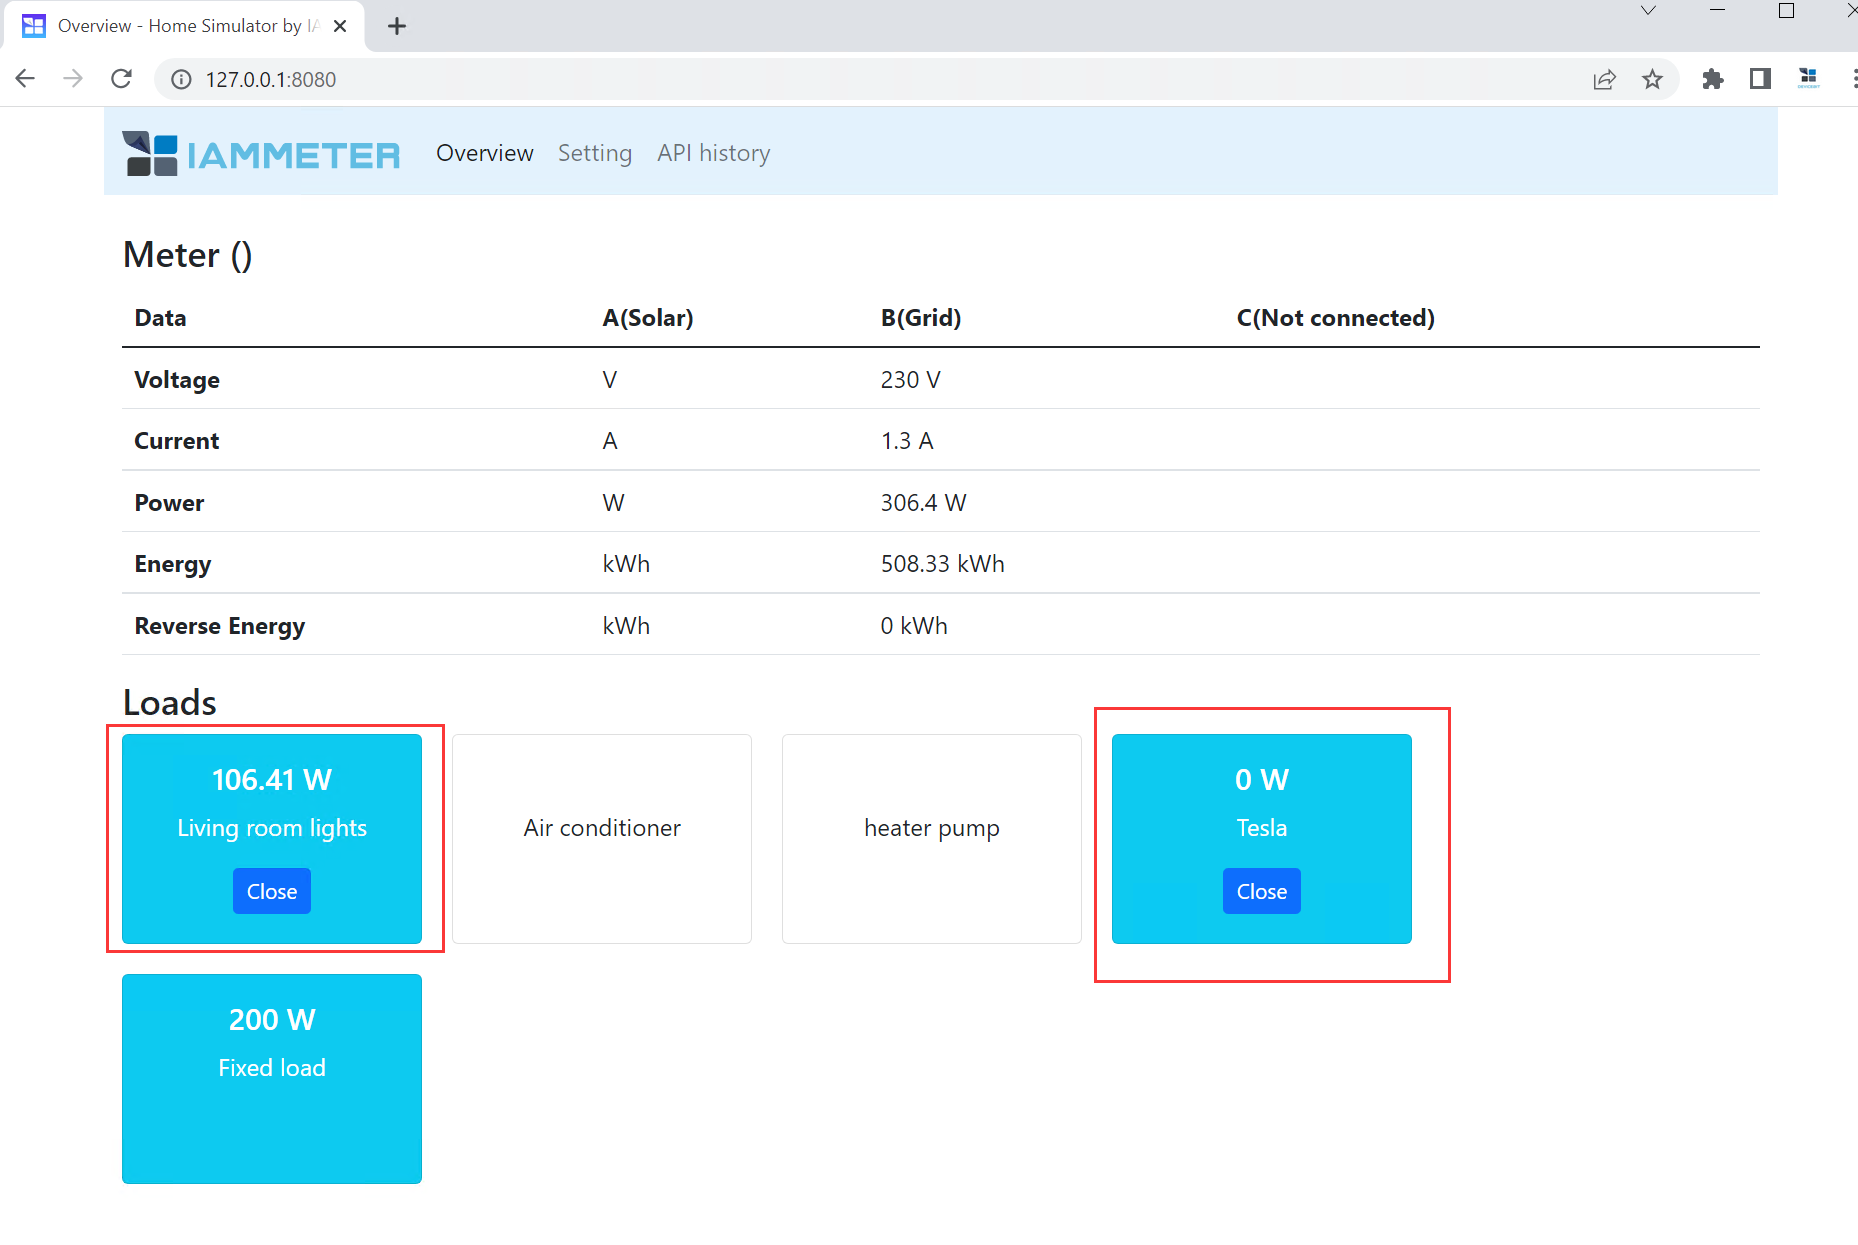
In this mode, the load can be switched on/off manually in the dashboard ,or by the API call.
Power: It is a power range . If you need a fixed power value, just keep the same value here.
You can switch on/off manually in the overview dashboard.
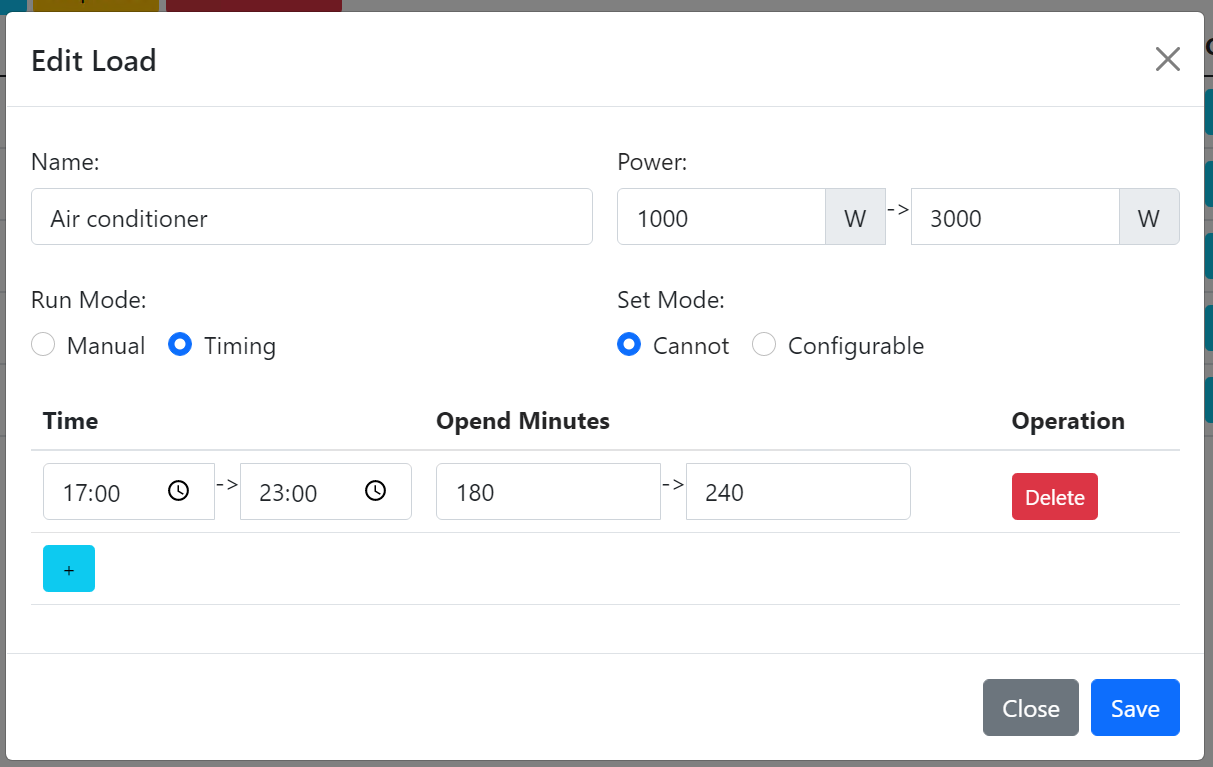
Power: it is a power range . If you need a fixed power value, just keep the same value here.
Time: set the run time range
Opened minutes: set the run time in this time range.
Take the above pic as an example, the "time" is 17:00-23:00, the "opened minutes" are 180-240. This setting means this load will run 180-240(random minutes) minutes from 17:00 to 23:00. If you want to let it run all the time from 17:00-23:00, the "opened minutes" should be set 360-360 (cover the whole 6 hours )
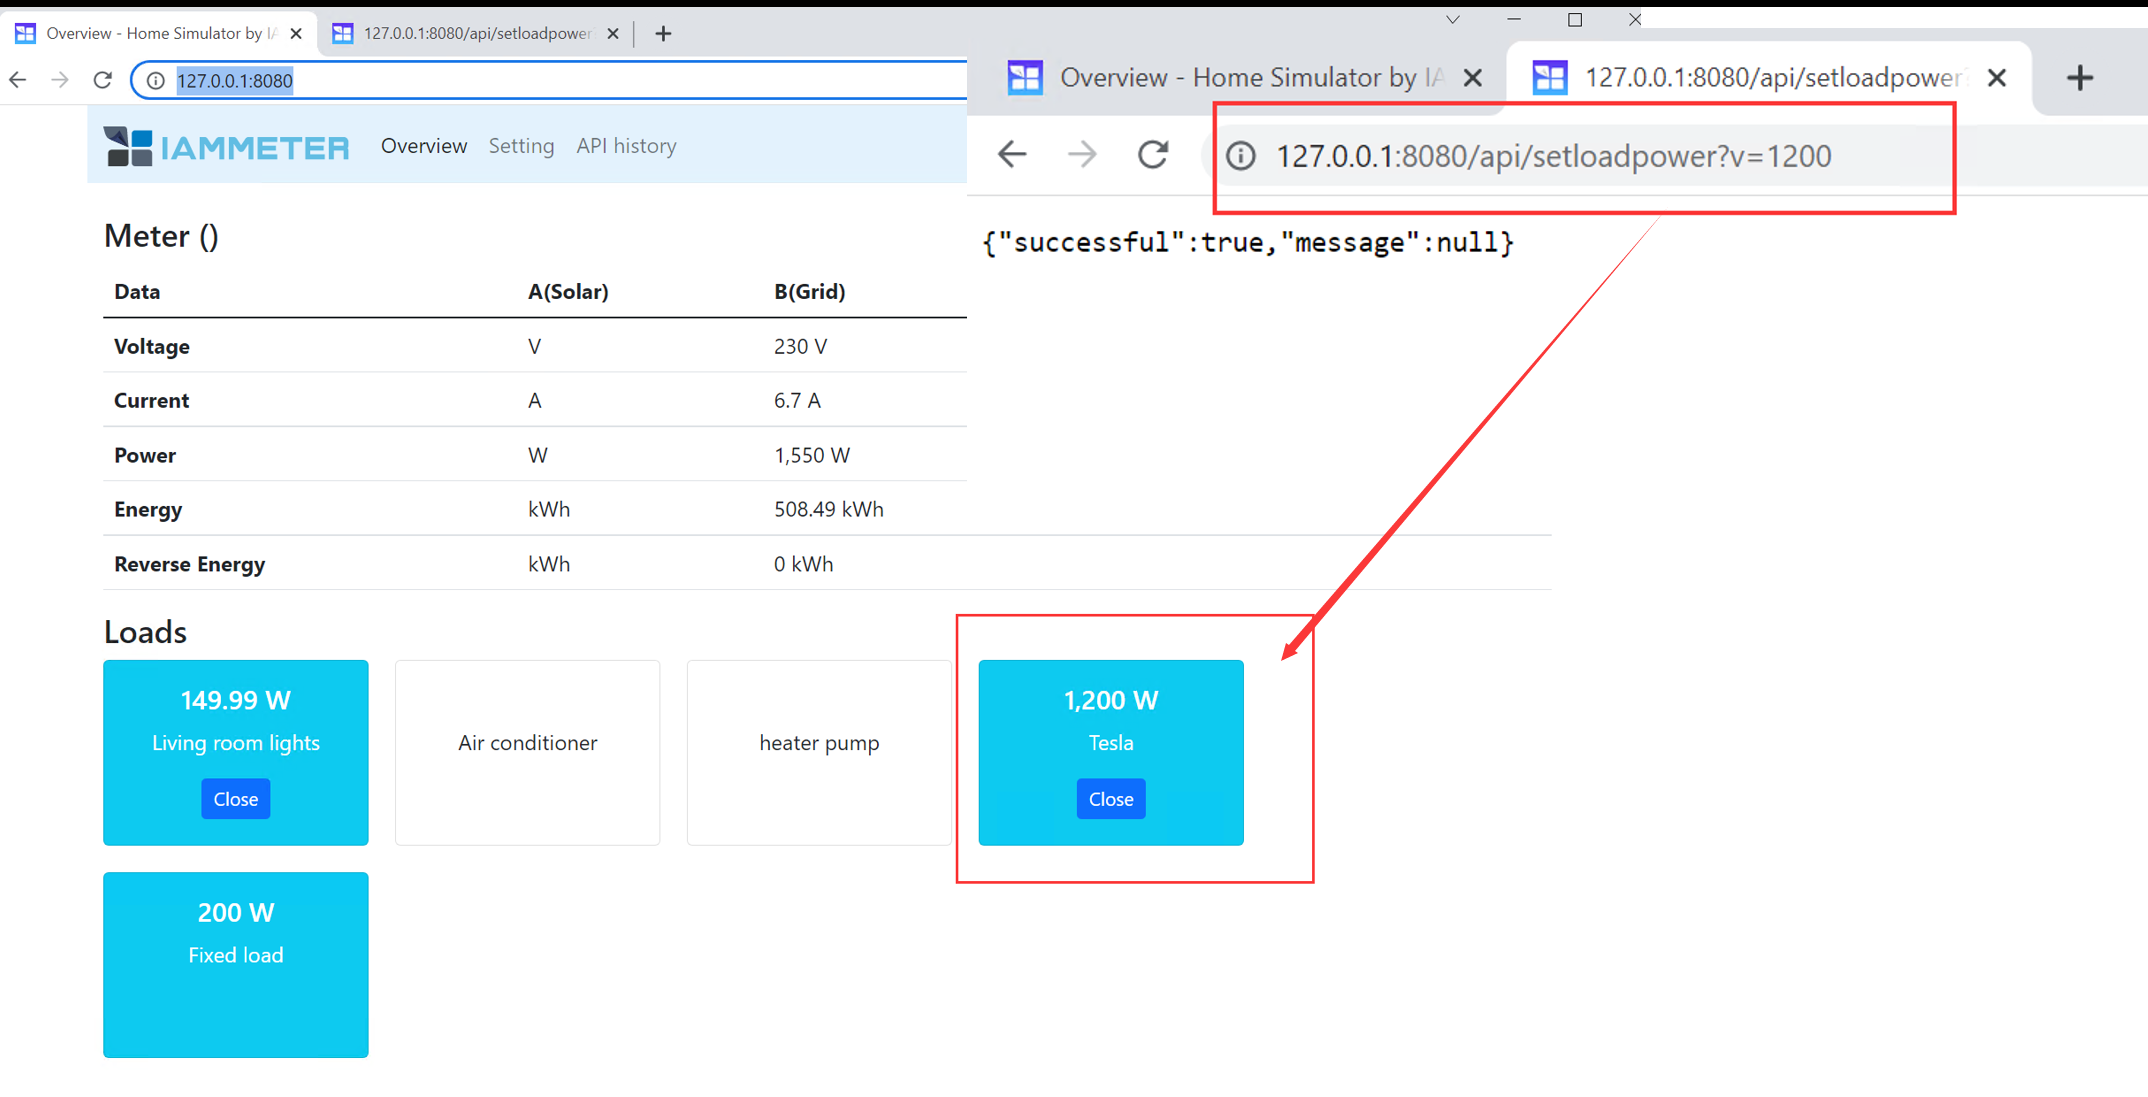
If the set mode is "configurable" , it means this load can be controlled by the API call, like below pic
/api/setloadpower?v=1200
Please note: the current version only supports one "Configurable" load now. we may increase the quantity of "configurable" load in next version.
tutorial: https://imeter.club/topic/349
Demo effect: http://ha.iammeter.com:18123/lovelace/sim1 (user:iammeter ,pwd:iammeter)
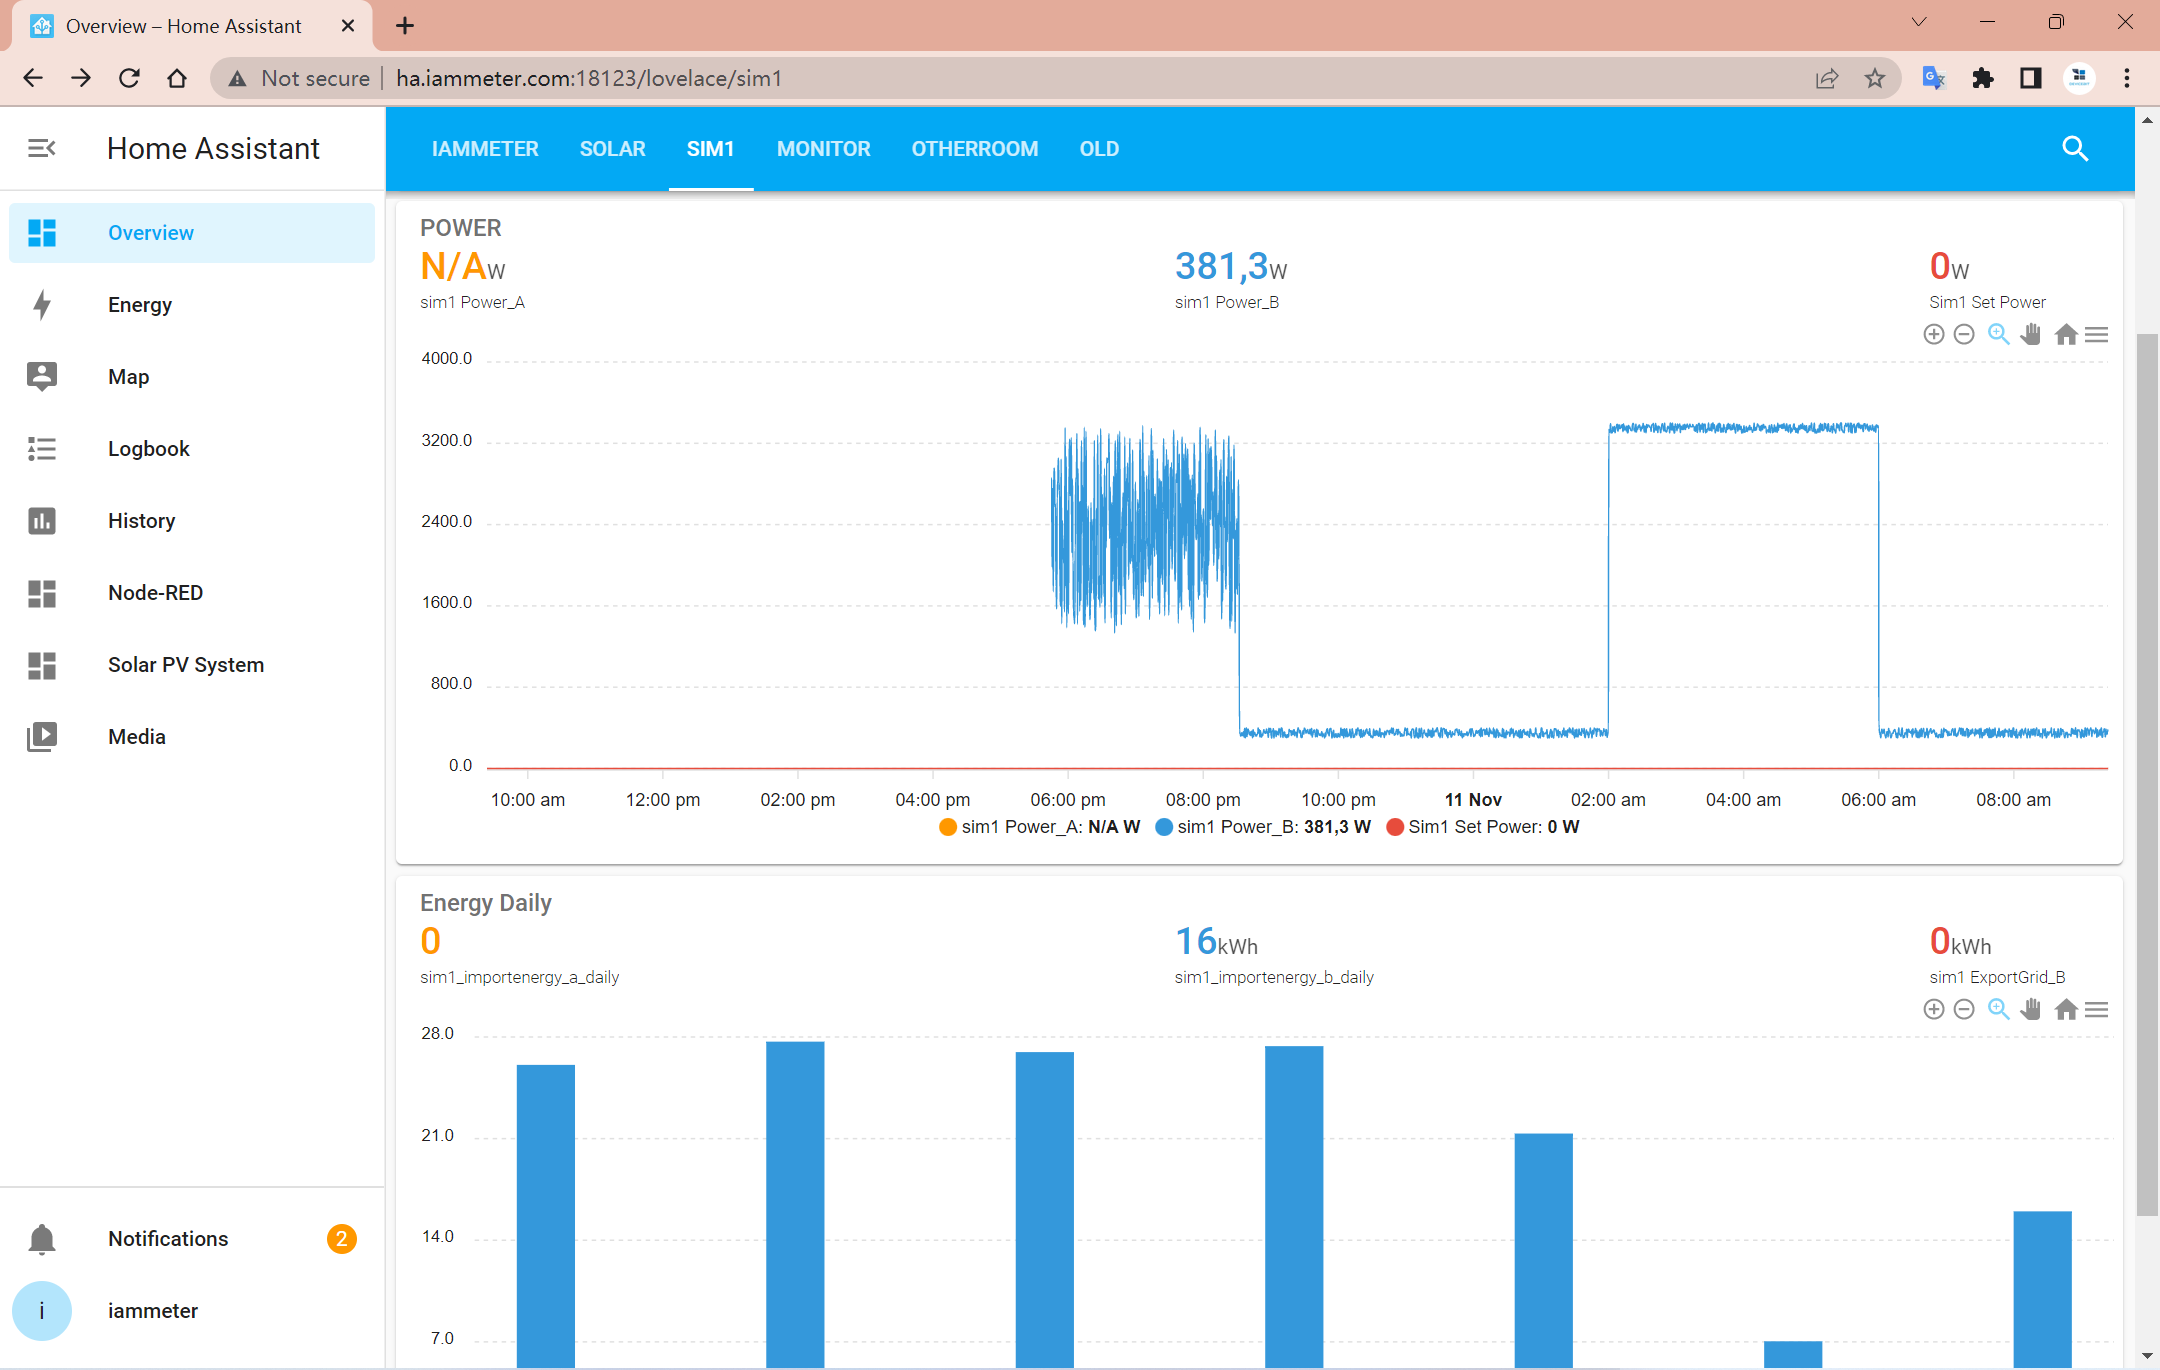
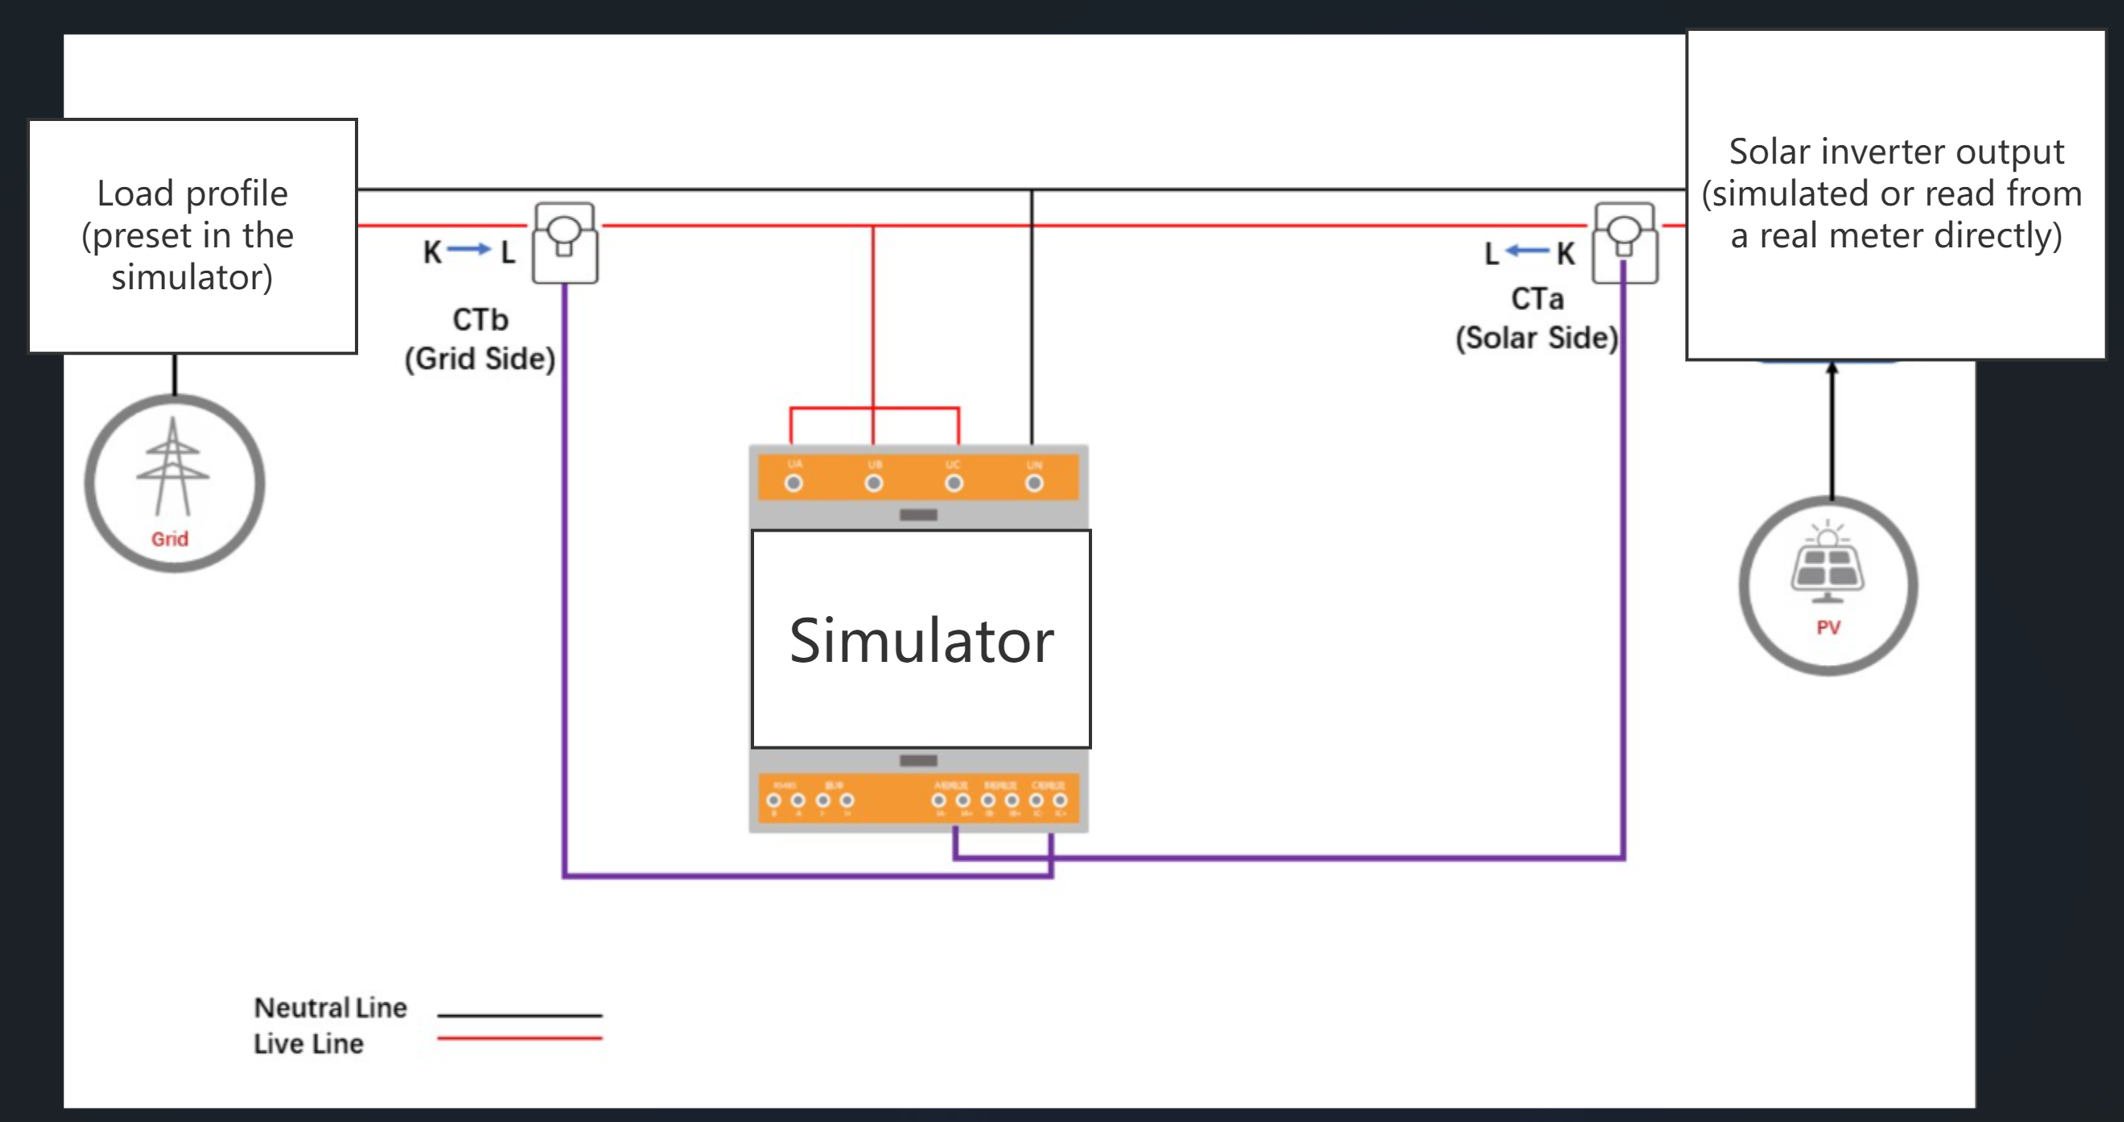
The simulator assumes you had installed the energy meter in this way.
After you have changed the load setting, you can also use the local API "monitorjson" to view the power changes in the phase B.
Three Phase Wi-Fi Energy Meter (WEM3080T)
Single Phase Wi-Fi Energy Meter (WEM3080)
Three Phase Wi-Fi Energy Meter (WEM3046T)
Three Phase Wi-Fi Energy Meter (WEM3050T)